Posts in Knitting
Nightshift, A Hand Spun Shawl Project
Nightshift Shawl - Pattern by Andrea Mowry - Studio Project by Loom & Spindle-4.jpg

I often find it difficult to decide what to spin next, often overwhelmed by the many project variables – colour, fibre, plies and ultimately what to knit/weave/crochet…

Gradually I’ve realised that I just need to get the process started by making one key decision.

For a while I’ve wanted to spin for a shawl project and drawn in by the intense colour-play of the Nightshift shawl I knew it was time to commit.

I’ve detailed below how making this one decision had a positive cascading effect on the direction of the project, from how I selected the fibre and determined colour, to how I would spin the yarn and knit the shawl.

I hope you enjoy this exploration in fibre, colour and yarn, and maybe even inspire your next spin!

Andrea - Loom & Spindle


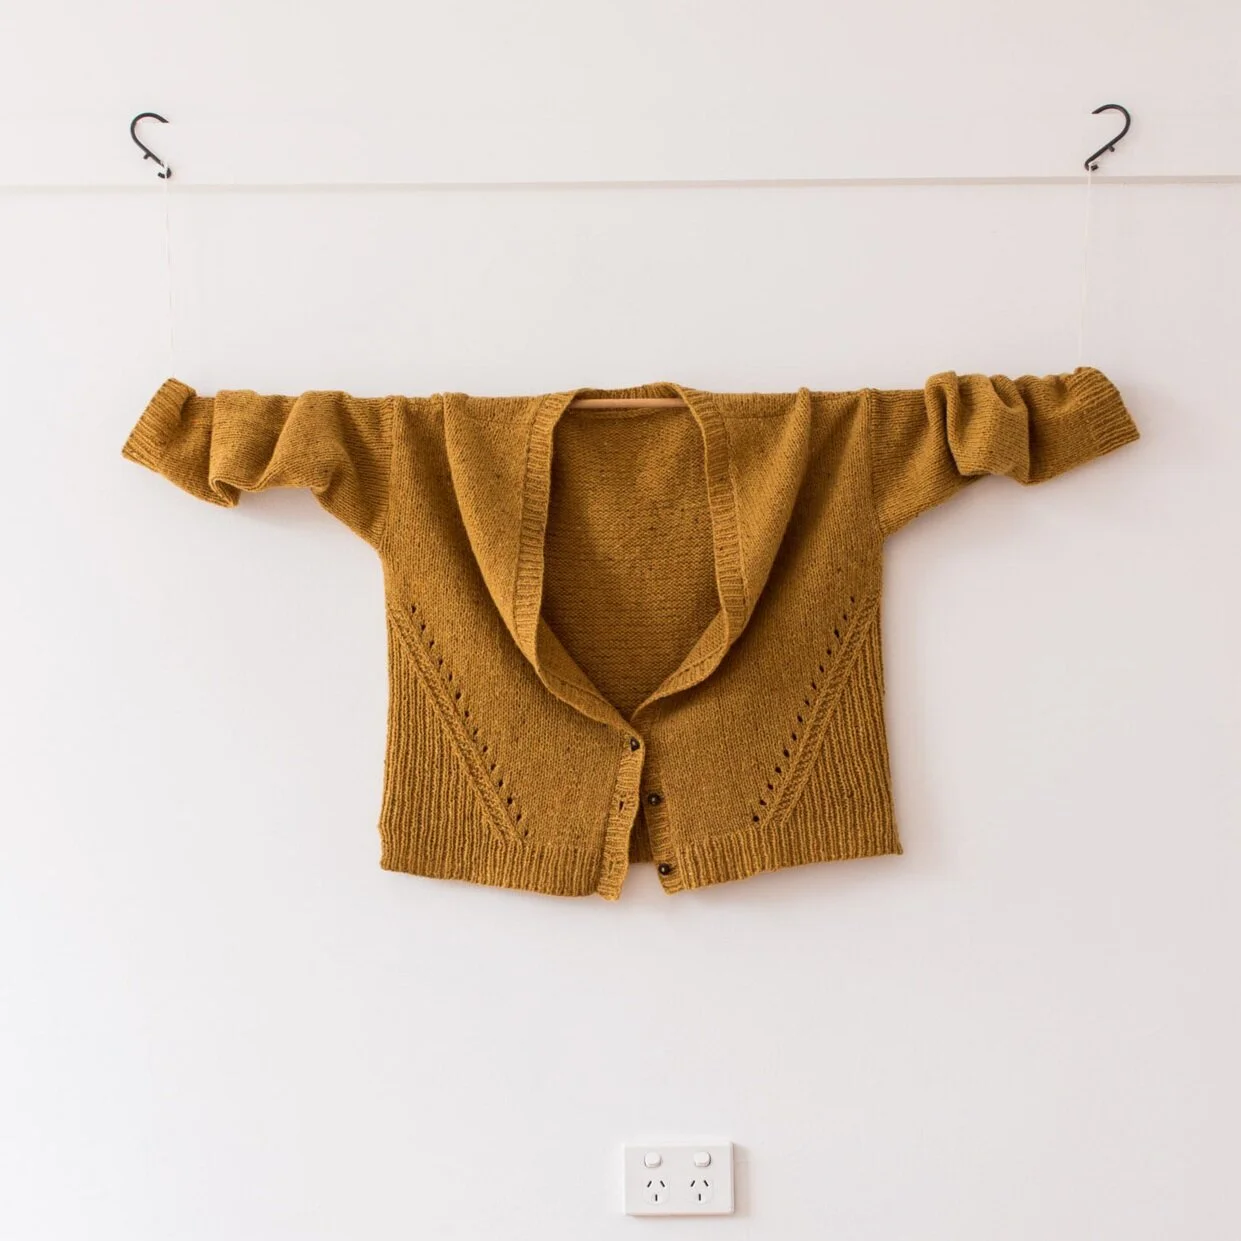
PROJECT: A Hand Spun Nightshift Shawl

Nightshift Shawl - Pattern by Andrea Mowry - Studio Project by Loom & Spindle-6.jpg

INTENTION

Hand spin yarn for a Nightshift shawl and explore:

  • Fibre selection and colour placement

  • Colour effects in the hand spun yarn

  • The resulting fabric and hand-feel

Nightshift Shawl - Pattern by Andrea Mowry - Studio Project by Loom & Spindle-27.jpg
Nightshift Shawl - Pattern by Andrea Mowry - Studio Project by Loom & Spindle-24.jpg

SKILLS

  • Hand spinning a two-ply worsted/10ply weight yarn

  • Knitted shawl construction

TOOLS

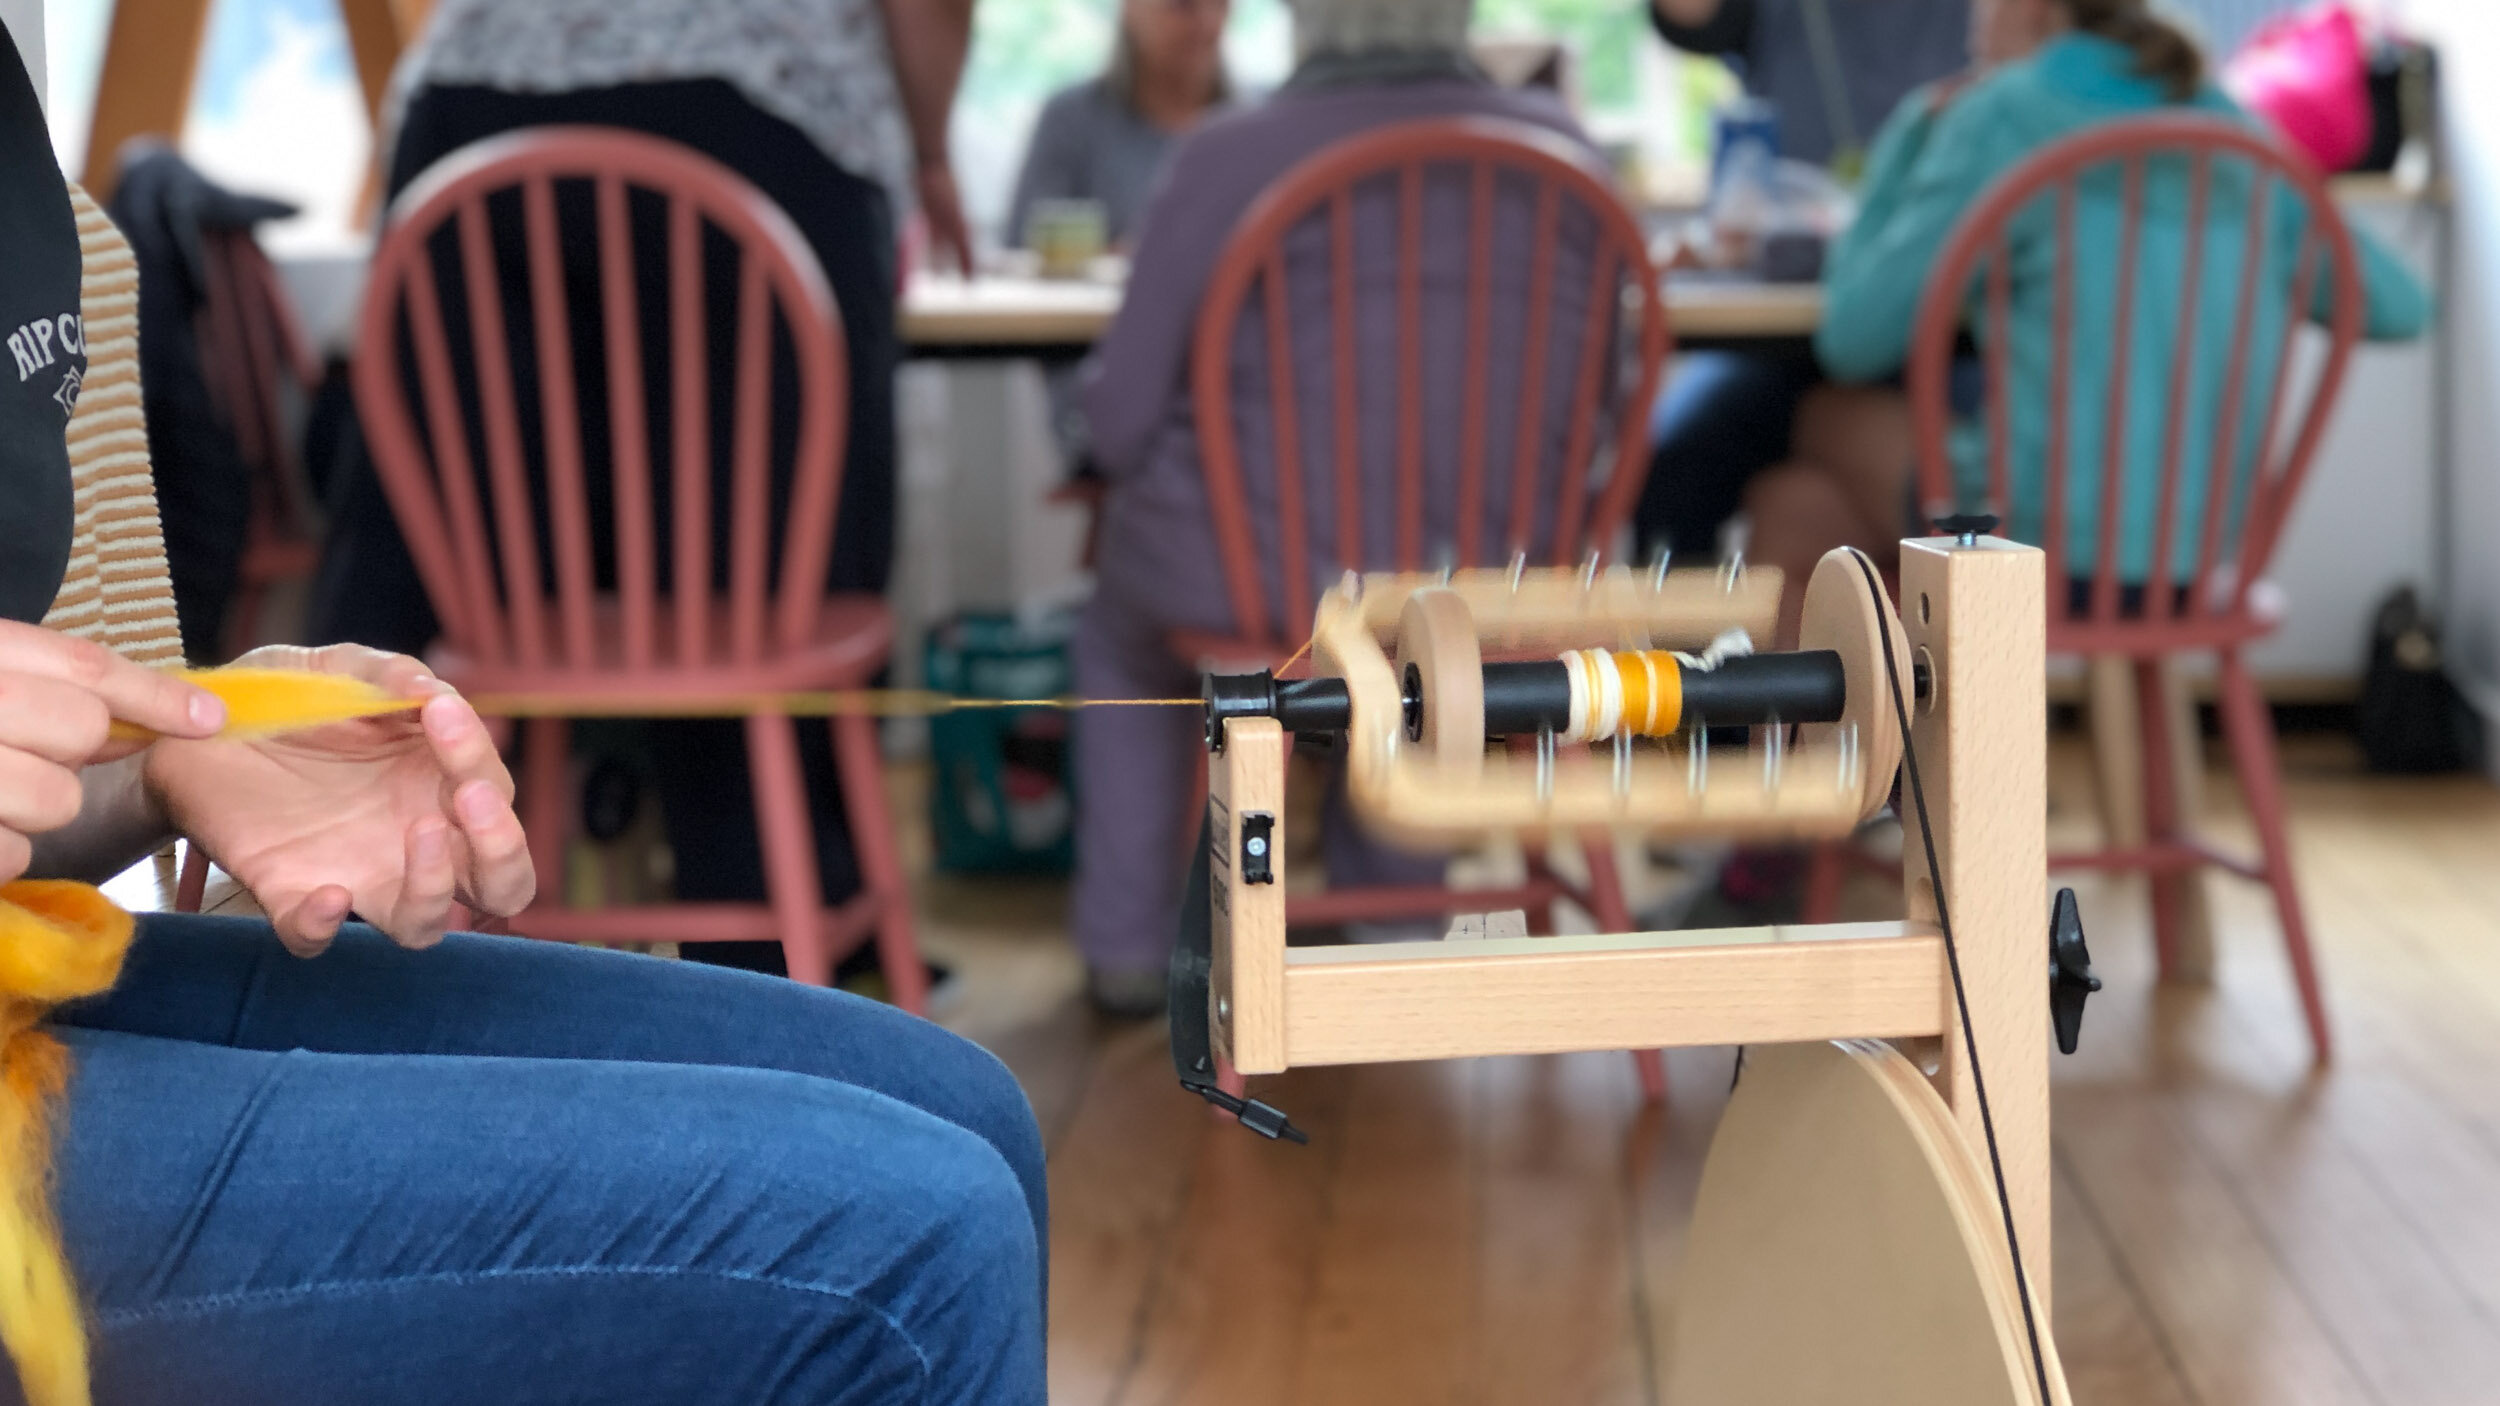
  • Spinning wheel - Louët S17 Spinning Wheel

  • Knitting needles - 5mm (US 8) circular needles (I used Chiaogoo Spin Bamboo Interchangables)

Nightshift Shawl - Pattern by Andrea Mowry - Studio Project by Loom & Spindle-31.jpg

MATERIALS

From my stash:

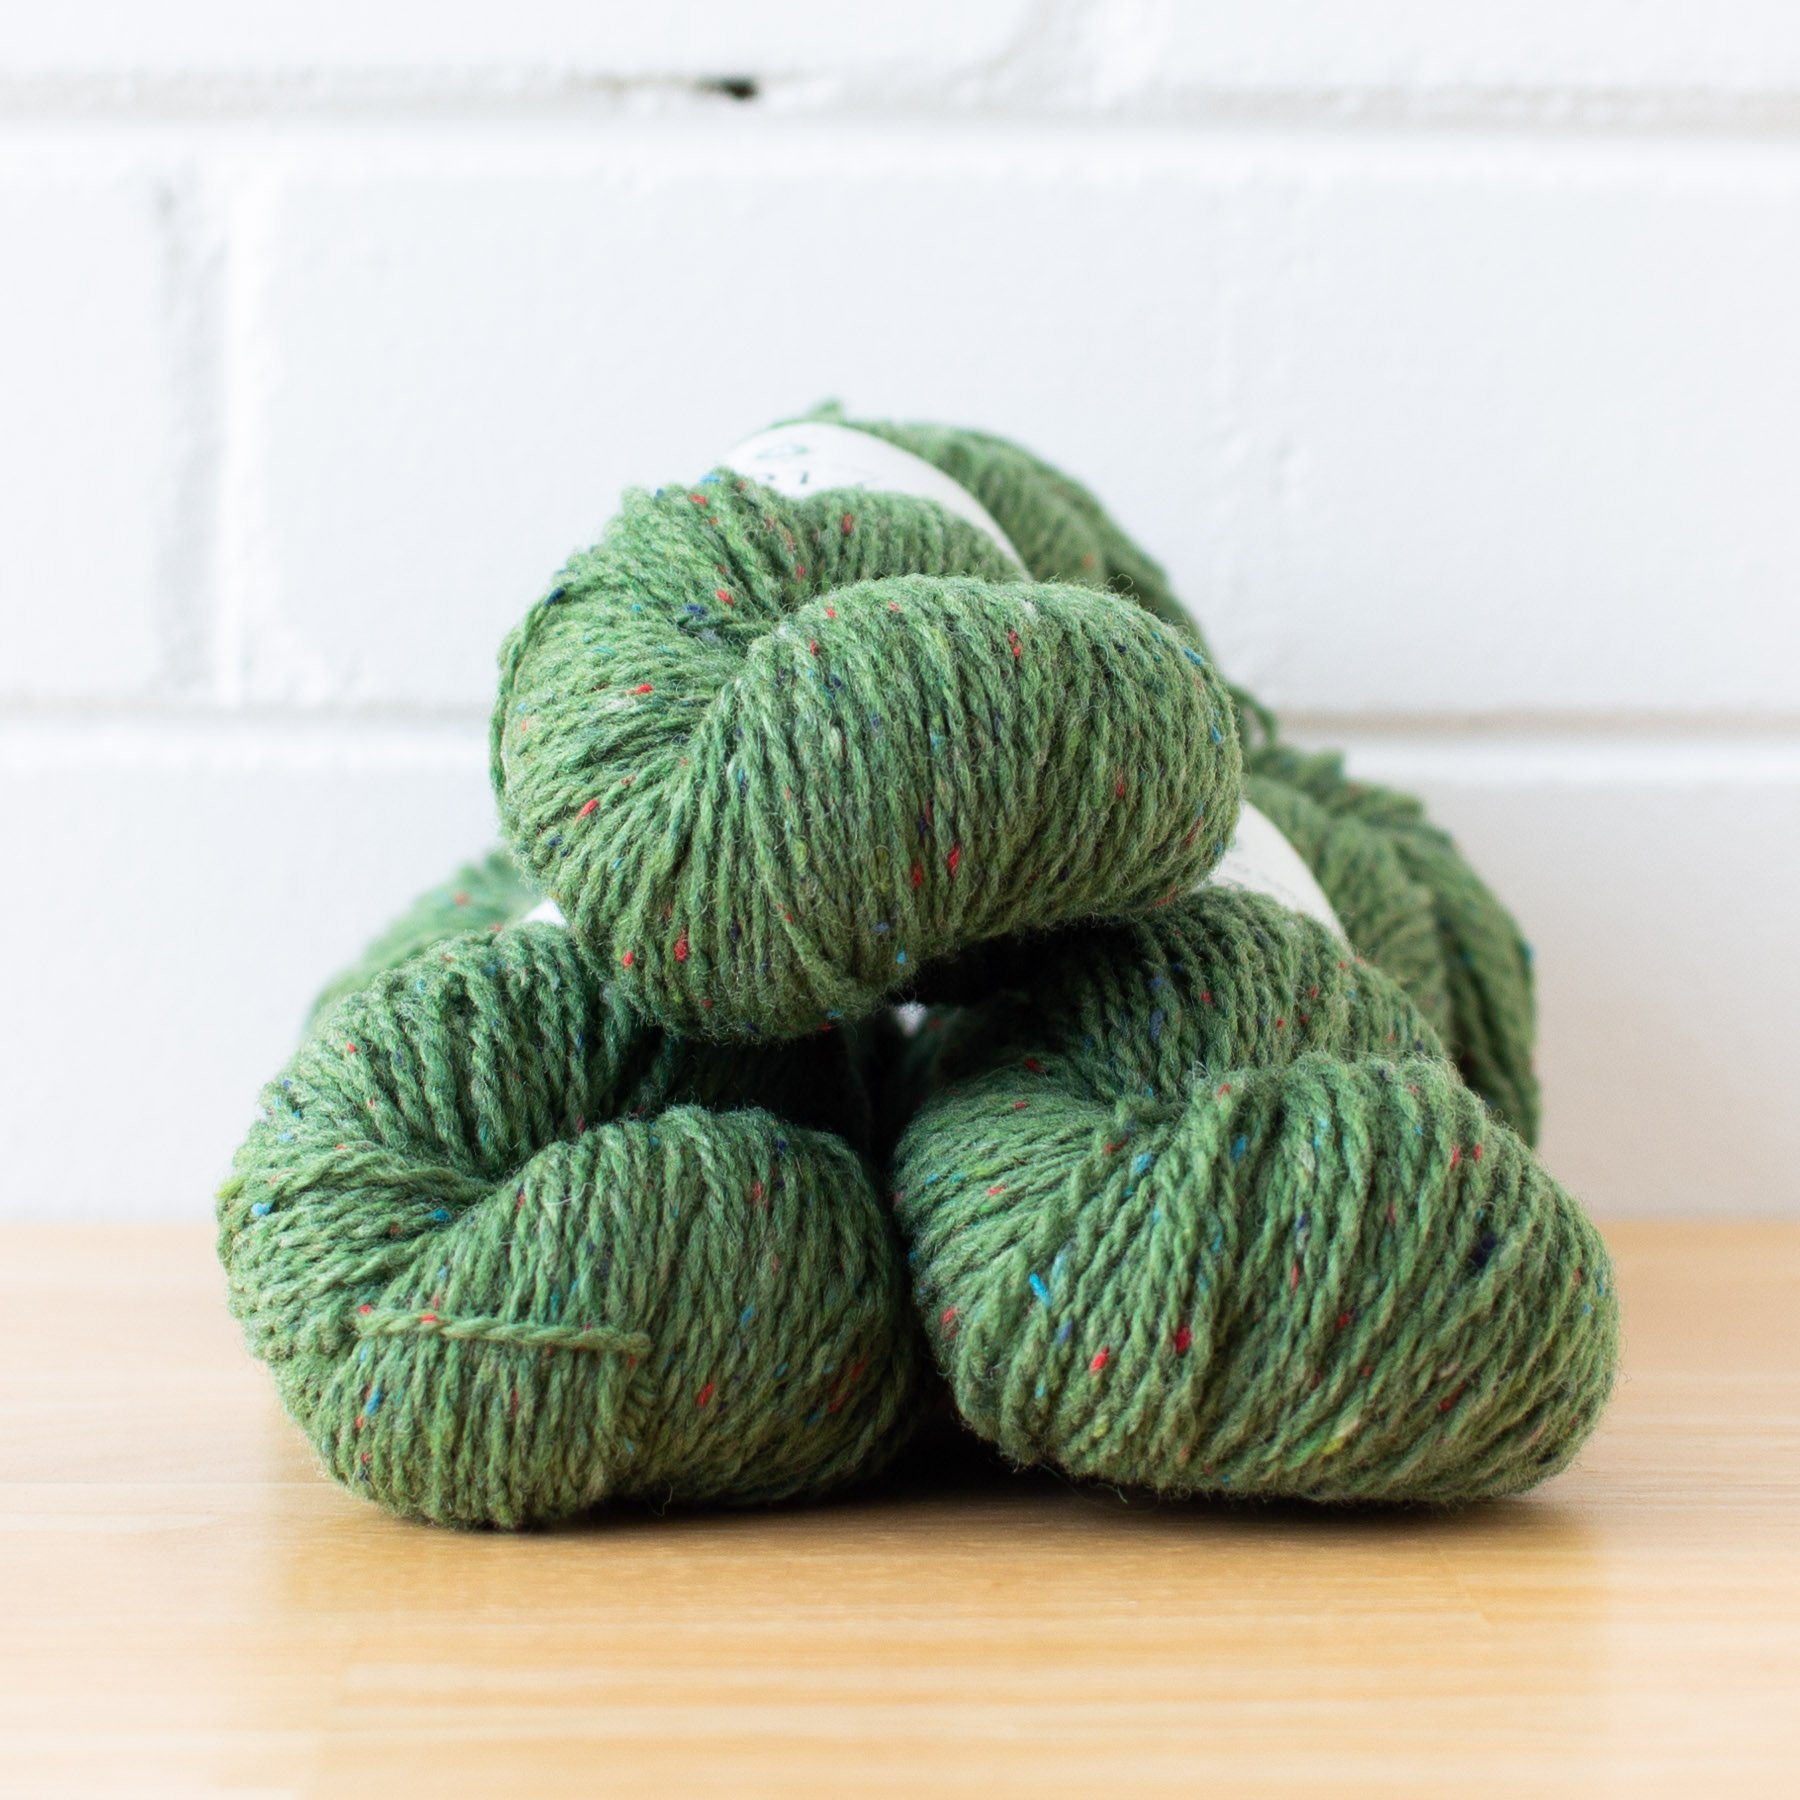
  • 50g, 21 micron Merino (yellow). Hand dyed by Created by Elsie B

  • 250g, 26 micron Warooka Station Merino x White Suffolk. Hand dyed by Shepherdess (no longer trading).

PATTERN

The Nightshift shawl pattern was published by Andrea Mowry of Drea Renee Knits in October 2018. It is available for purchase on Ravelry or dreareneeknits.com.

Nightshift Shawl - Pattern by Andrea Mowry - Studio Project by Loom & Spindle-1.jpg

PROCESS

FIBRE SELECTION

  • Spinning for a shawl project, my prerequisite when choosing fibre was for something that had a next-to-skin softness. Colour-play was also going to be a big part of this project, so I narrowed the fibre selection down further to just hand-dyed braids with interesting colour repeats.

  • Working from my stash, I pulled out hand dyed braids in Merino and similar fibres and started grouping compatible colourways.

  •  I settled on a braid of Merino and several braids of a Merino X Suffolk fibre, approximately 300g in total. I had previously sampled the Merino X Suffolk. The resulting yarn was soft and bouncy similar in characteristic to Merino.

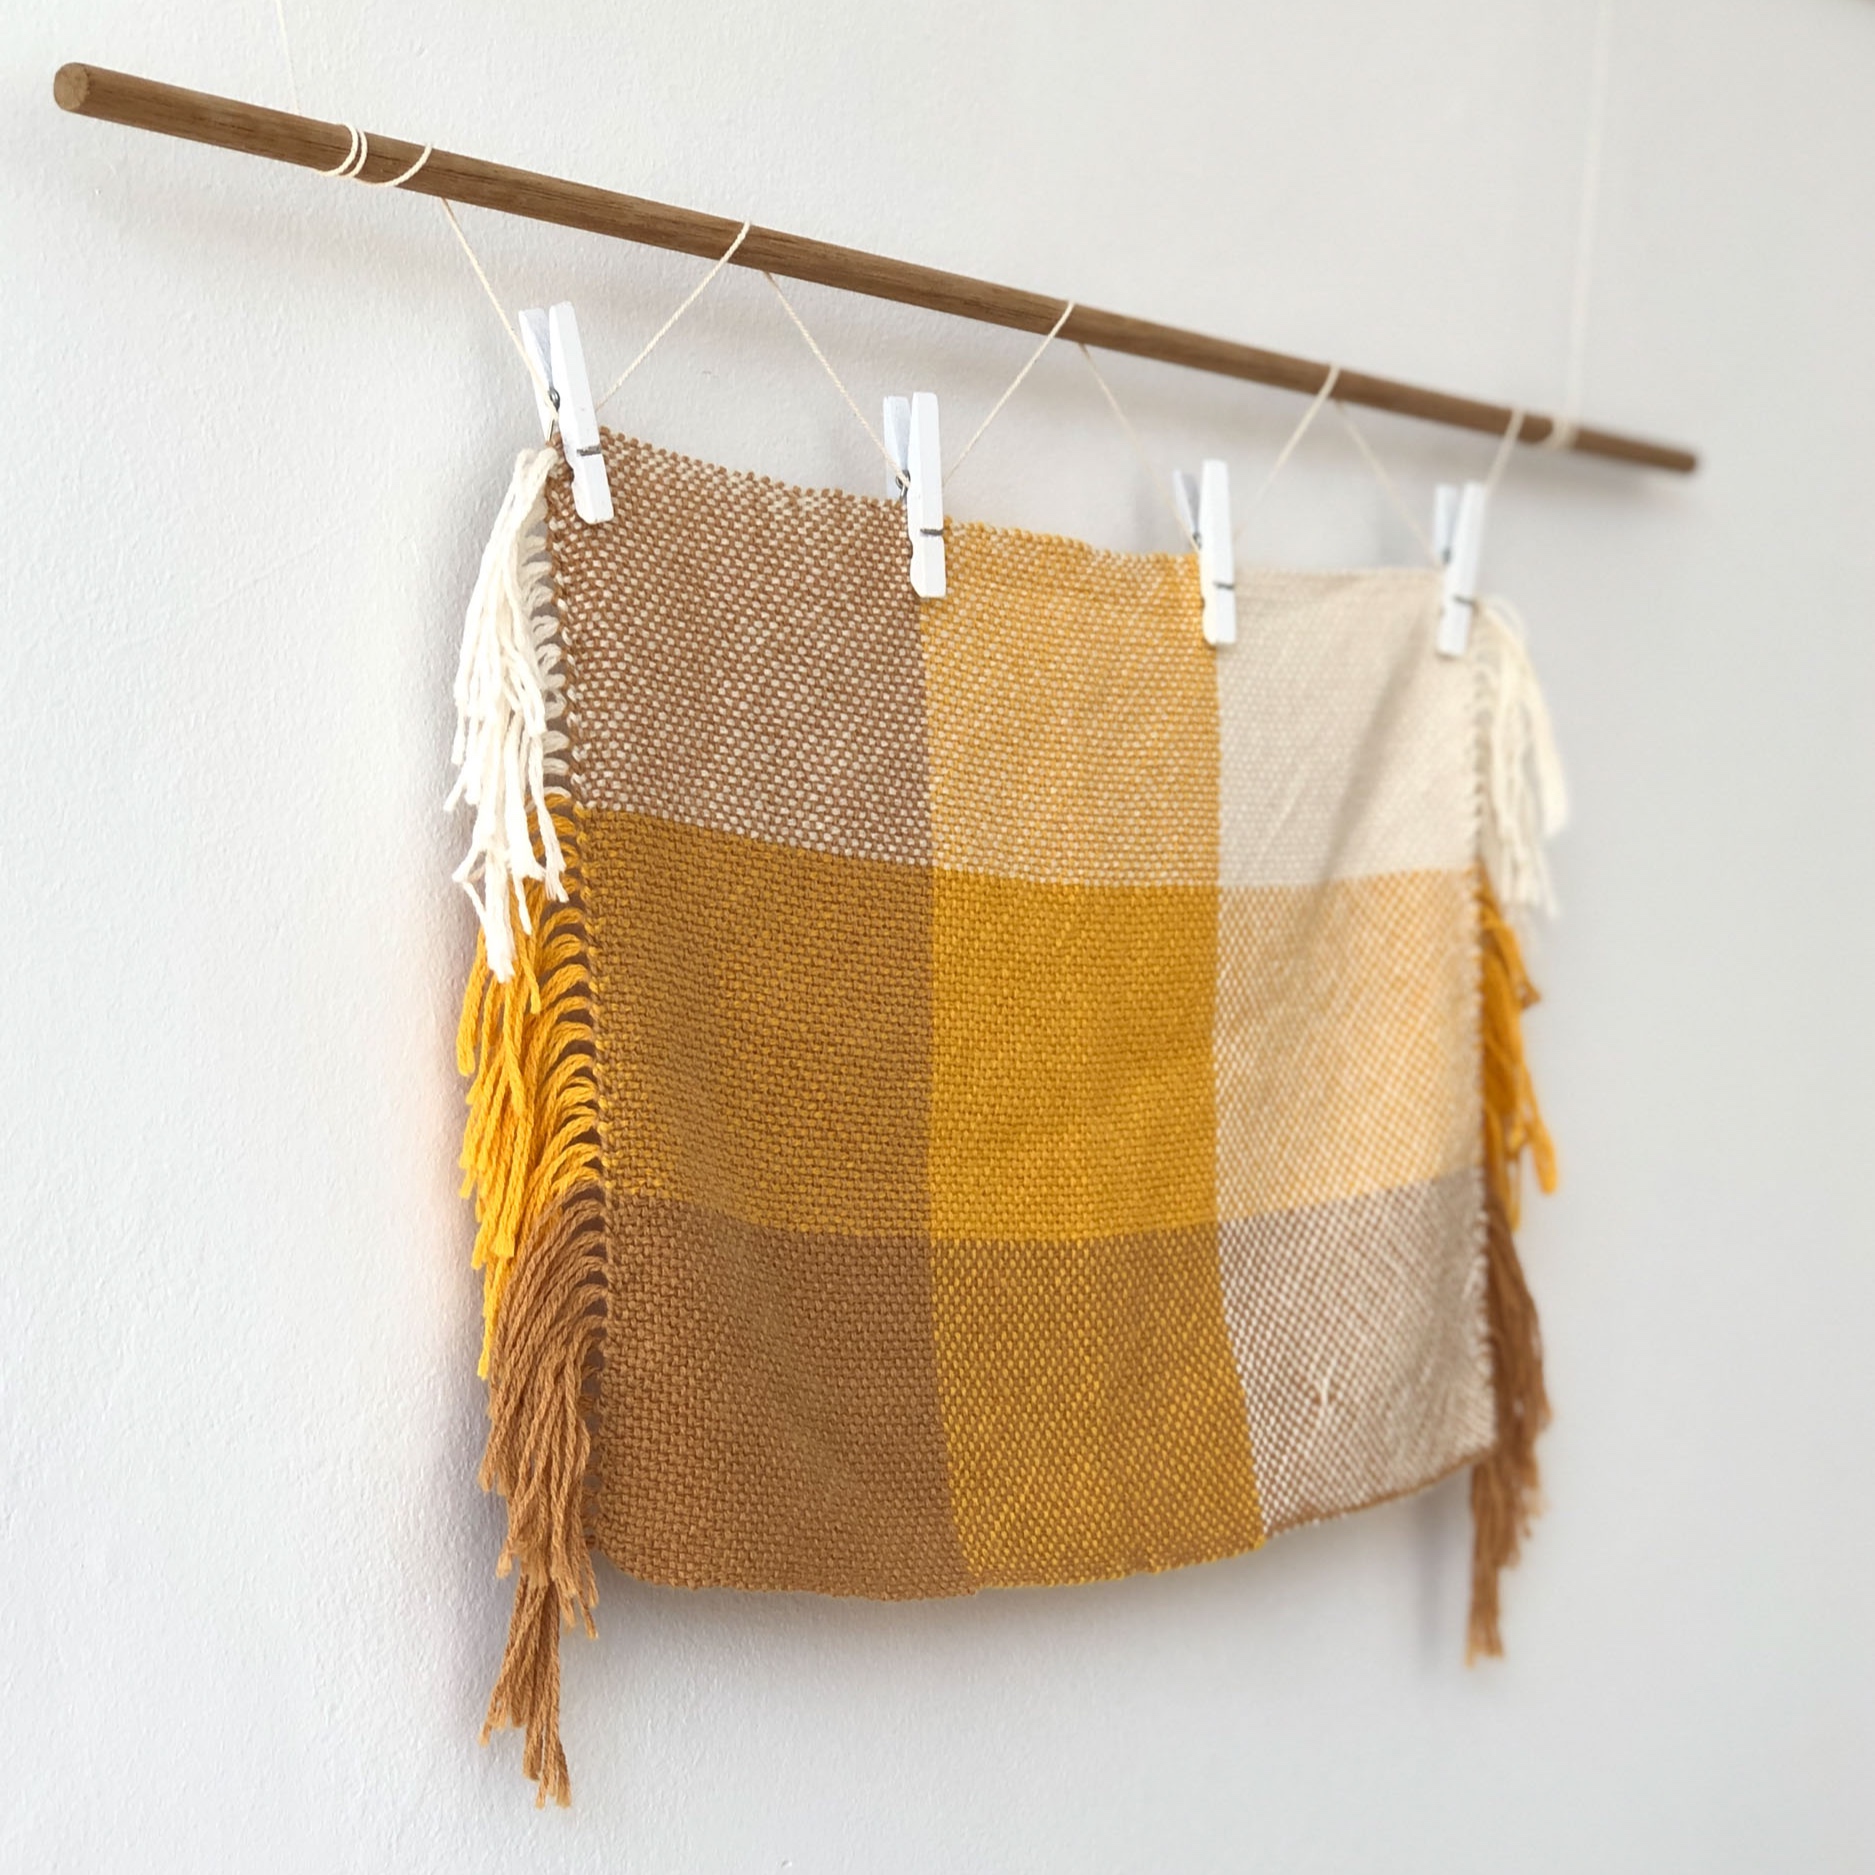
  • Featuring heavily saturated shades of yellow, orange, red, purple and green, the resulting palette was definitely out of my comfort zone. Though, I considered the colour intensity and saturation of each shade would correspond well to the design elements of the Nightshift pattern.

Nightshift fibre.jpg

THE SPIN

  • The intention was to spin six, 2-ply yarns at a worsted/10ply weight to get a knitted gauge similar to what was specified in the pattern.

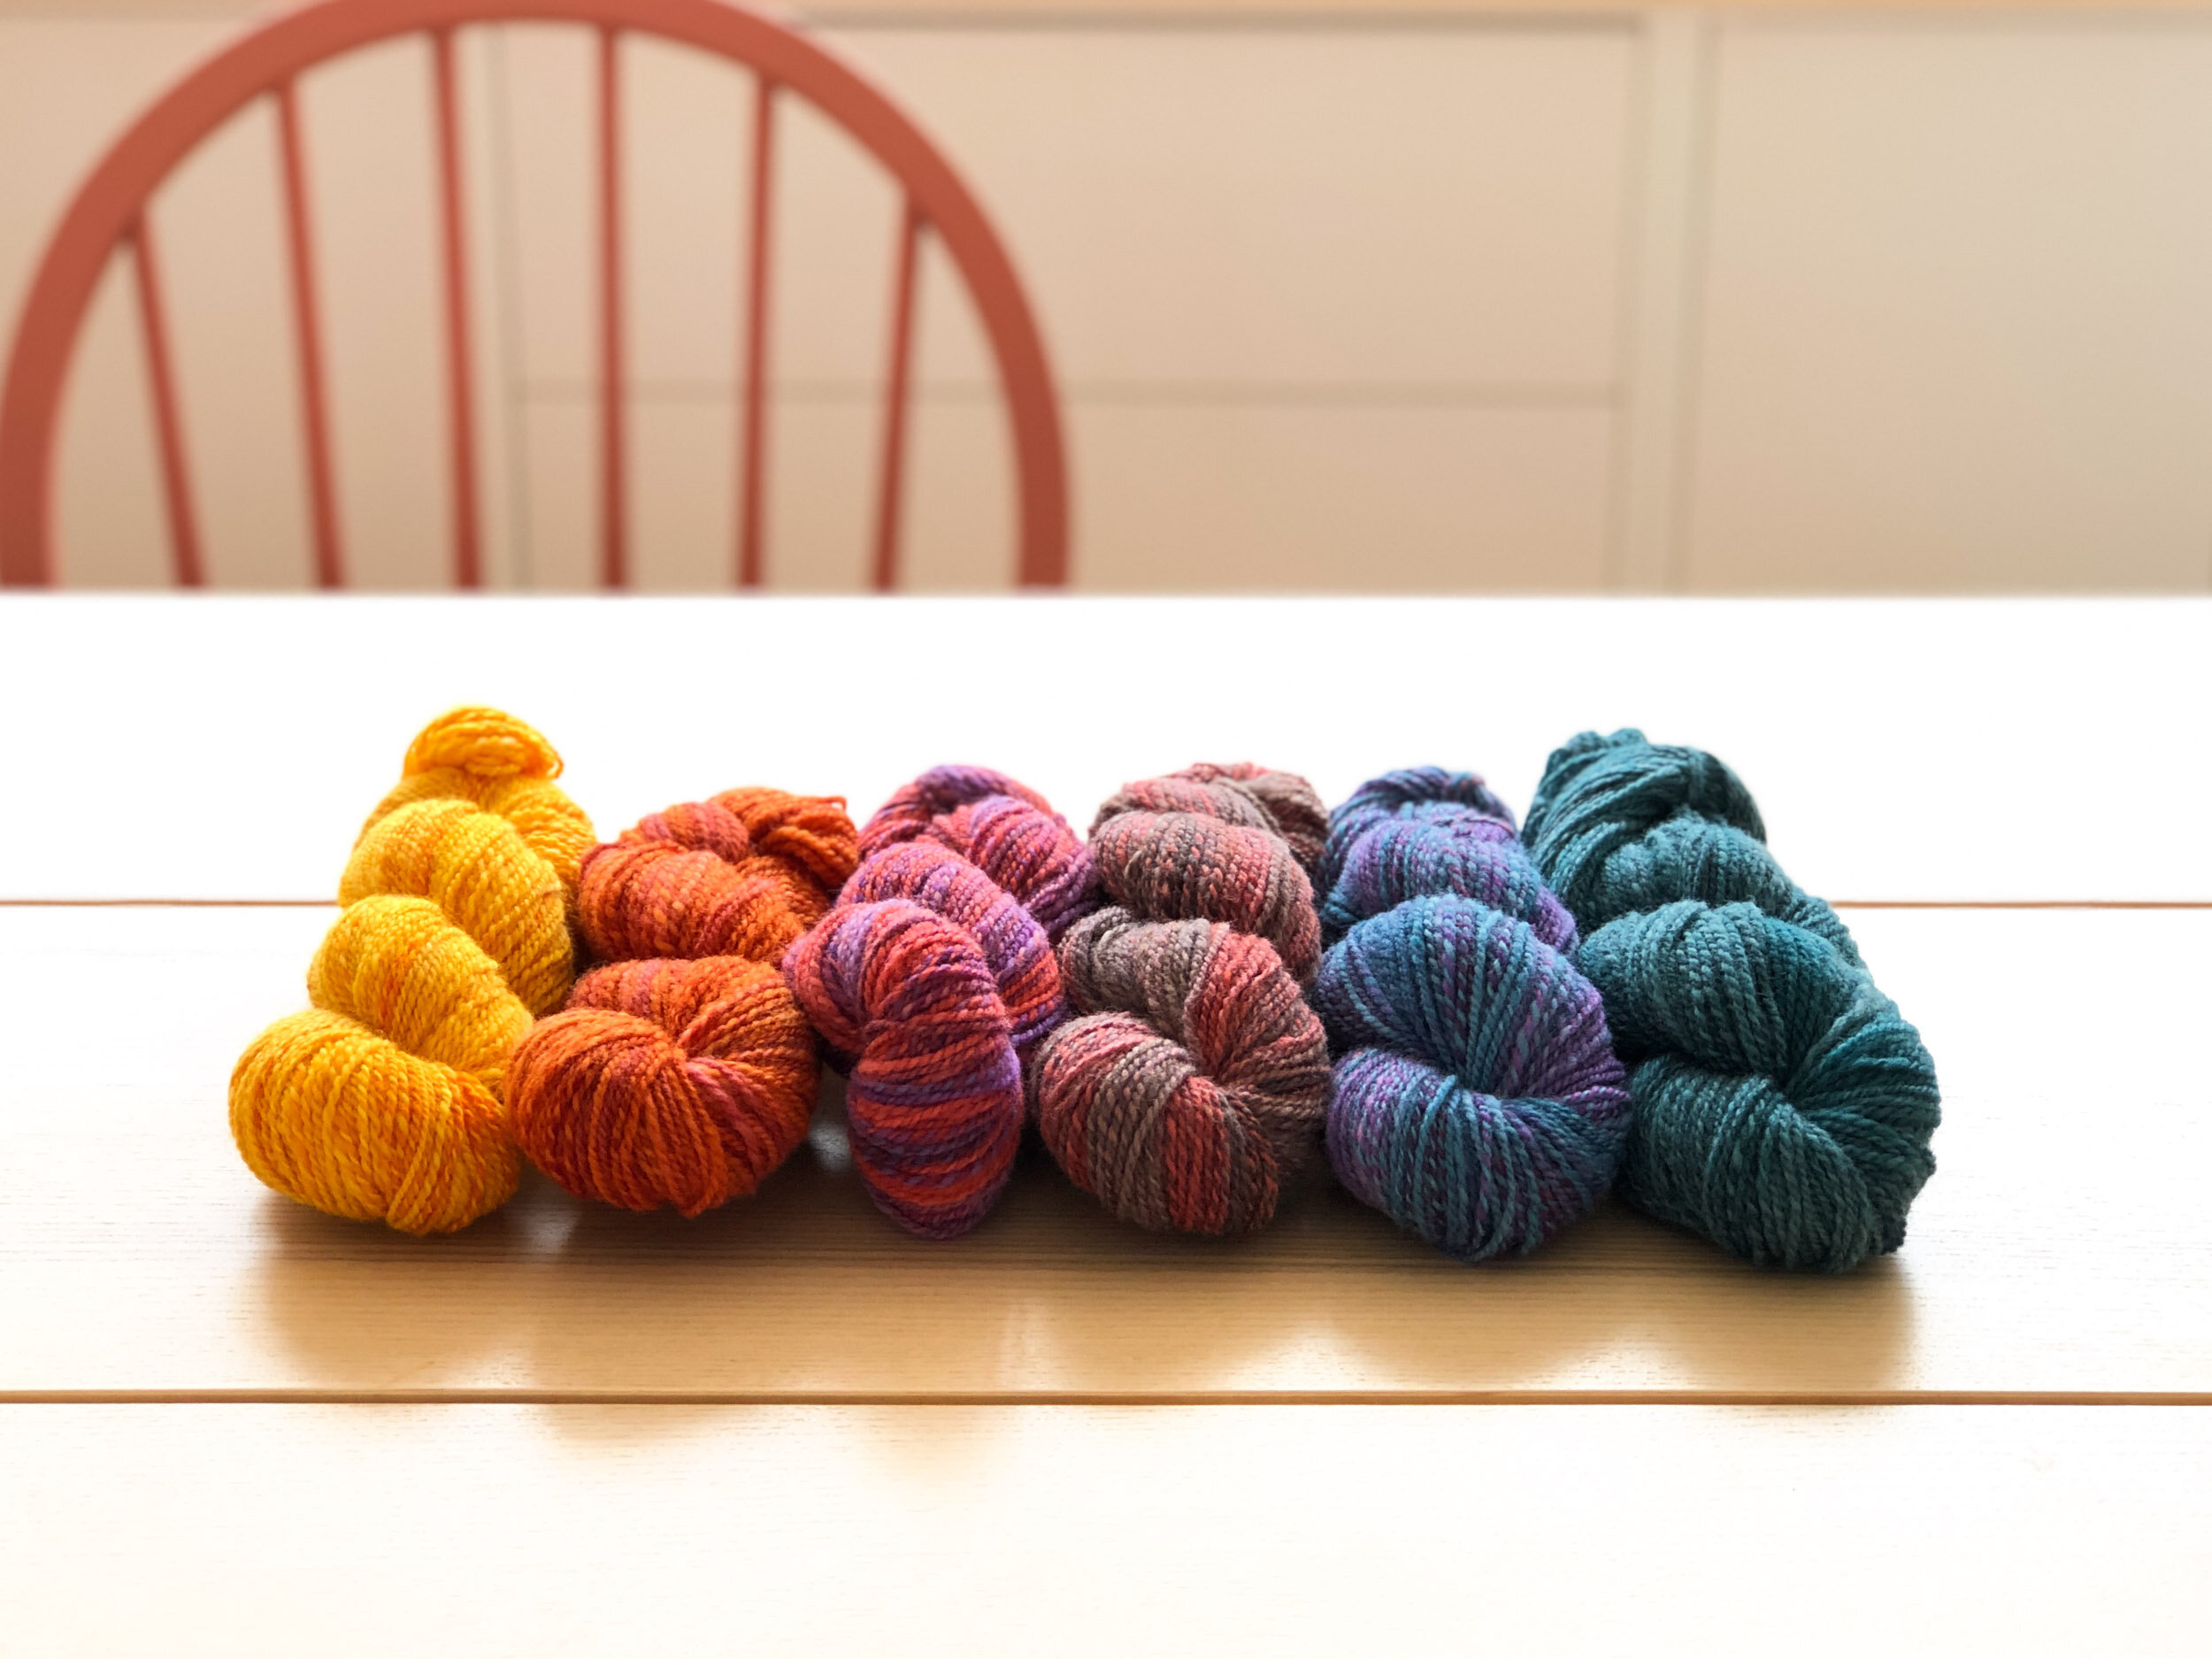
  • To prep the fibre I broke the fibre down into six 50g lots, carefully distributing colours to ensure I would end up with six colour differentiated yarns:

    • Yellow

    • Orange/Red

    • Red/Grey

    • Red/Purple

    • Green/Purple

    • Green

  • Then for my two plies I studied the colouring in each bundle and split each into two portions keeping the colour evenly distributed.

Nightshift Shawl - Pattern by Andrea Mowry - Studio Project by Loom & Spindle-22.jpg
  • For each colour bundle I spun one of the portions from the tip making the first ply. For the second ply I stripped down the remaining portions so the colours would repeat more frequently.

  • Each ply was spun in the Z direction at approximately 28-30 WPI, then plied together in the S direction to create a 2-ply yarn.

  • Each yarn was finished with a short soak in cool water, pressed in a towel to remove the excess and then hung to dry.
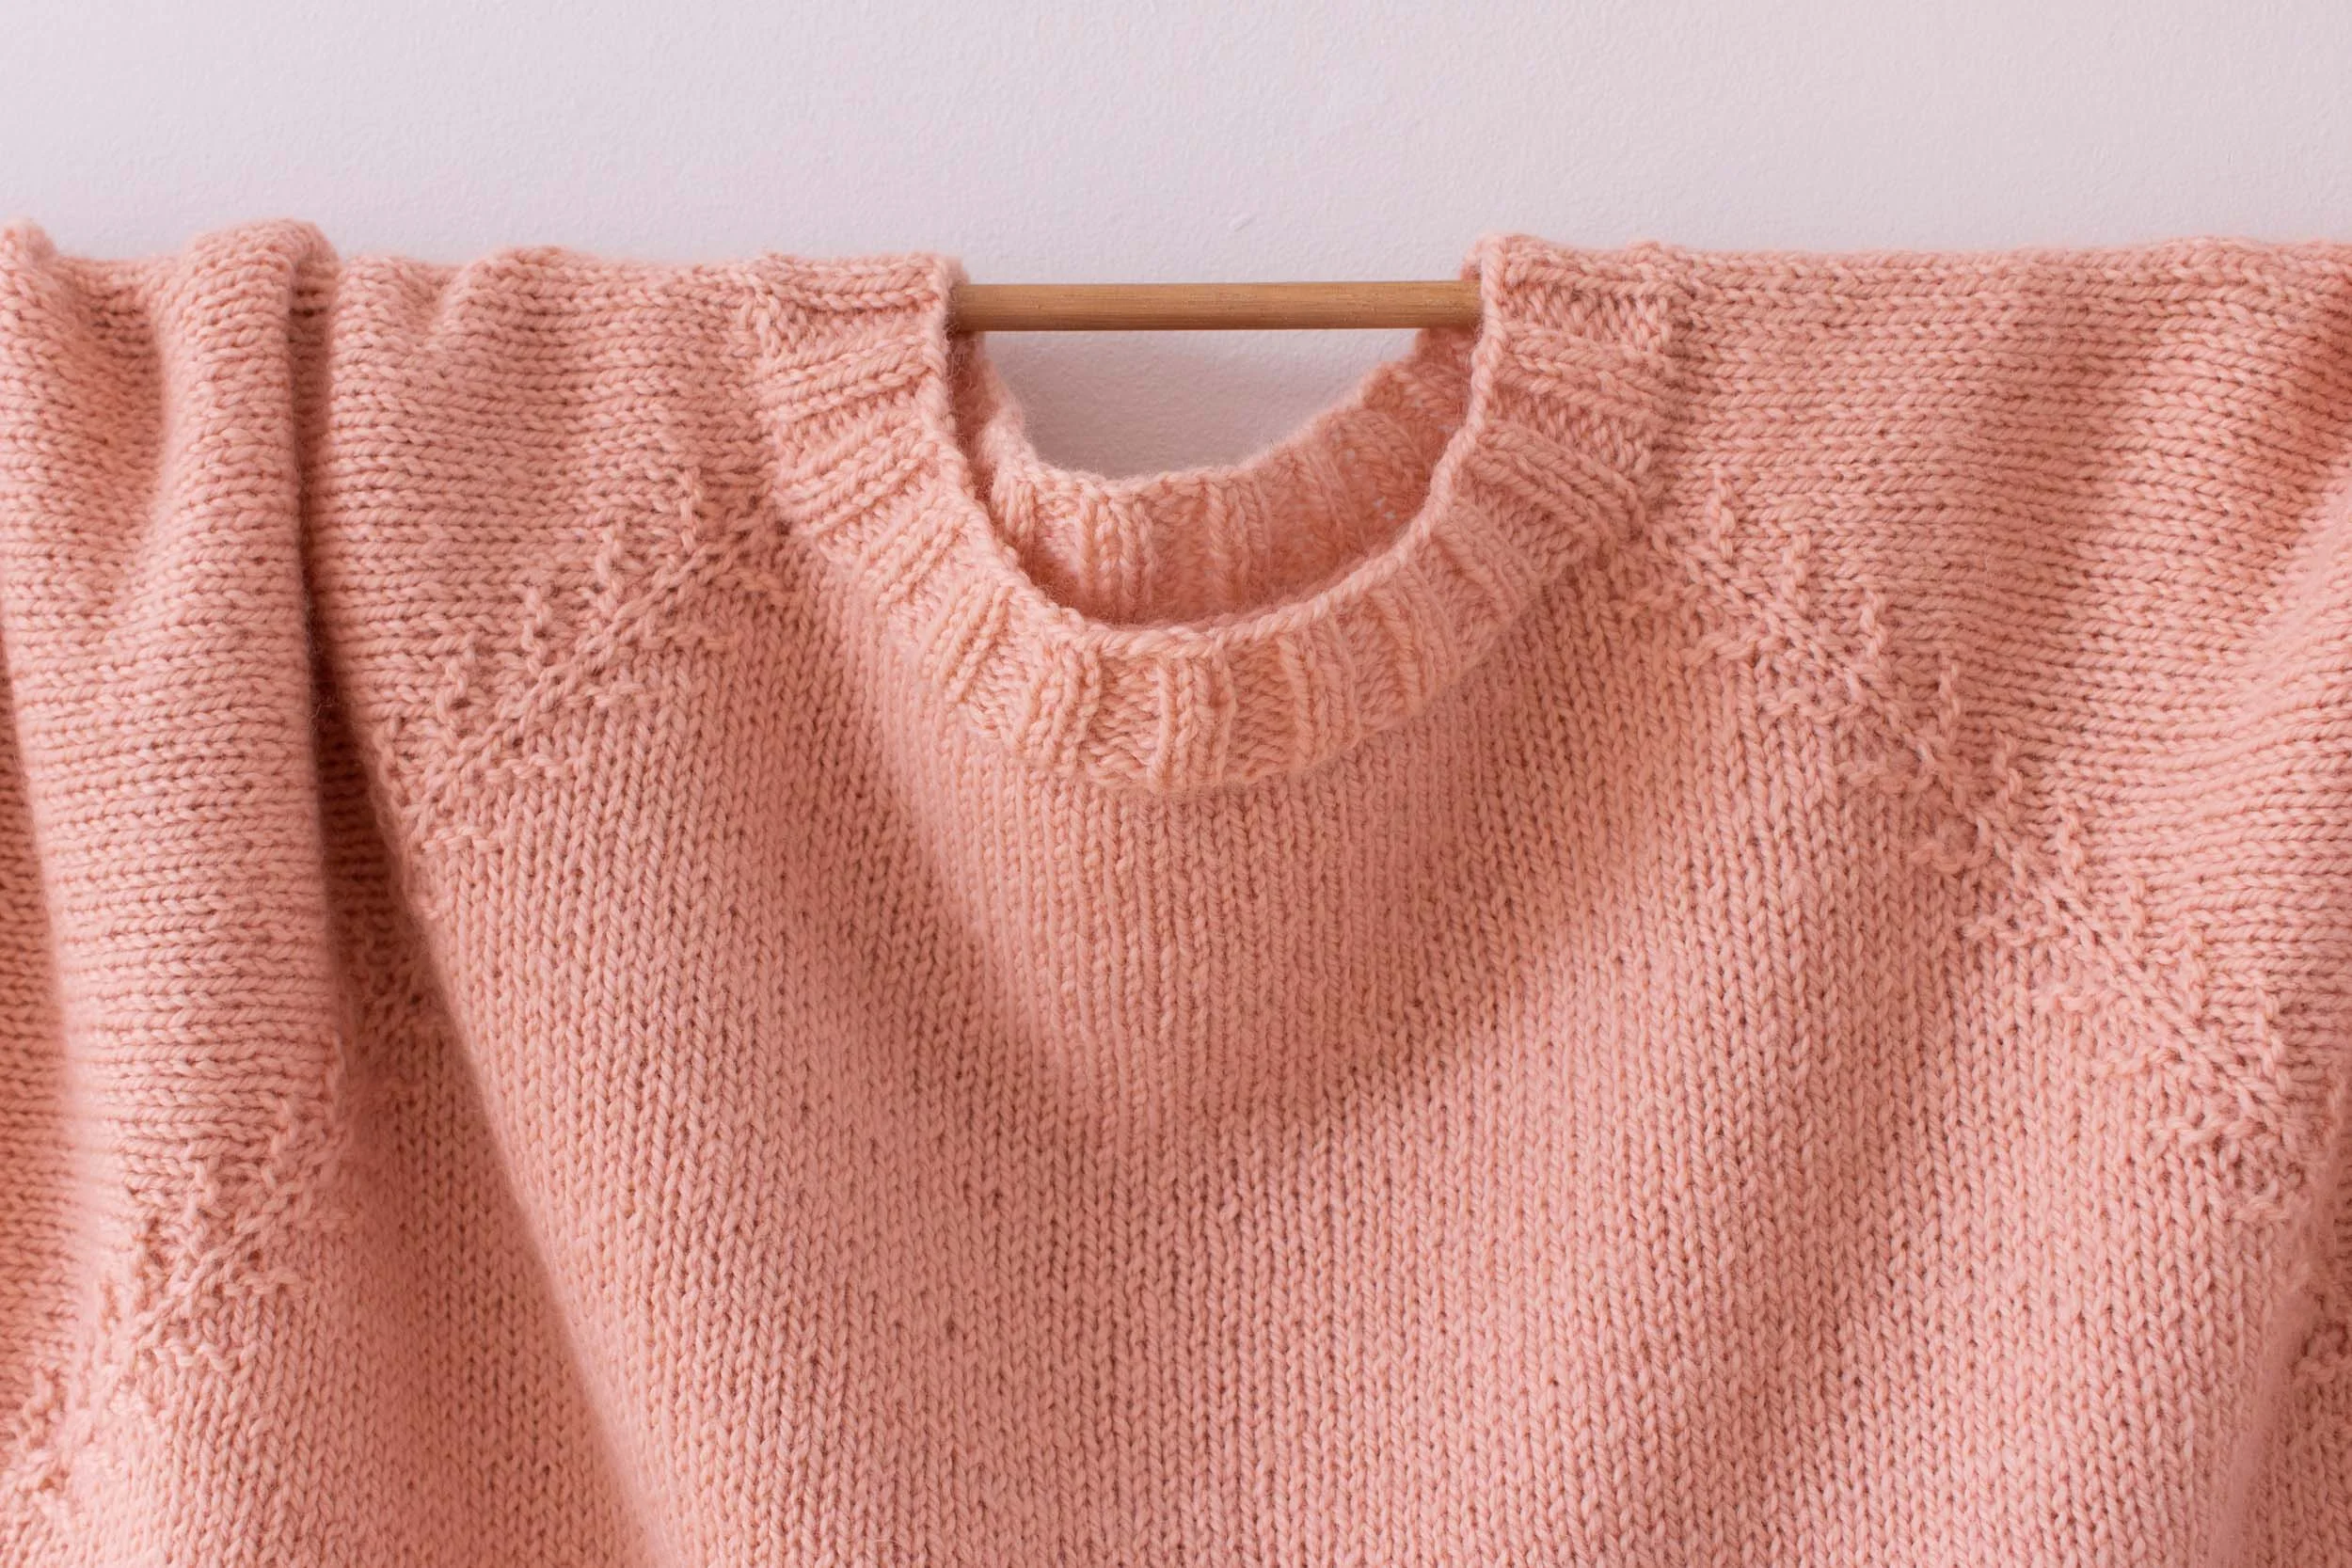
Nightshift Shawl - Pattern by Andrea Mowry - Studio Project by Loom & Spindle-20.jpg
Nightshift Shawl - Pattern by Andrea Mowry - Studio Project by Loom & Spindle-23.jpg

KNITTING

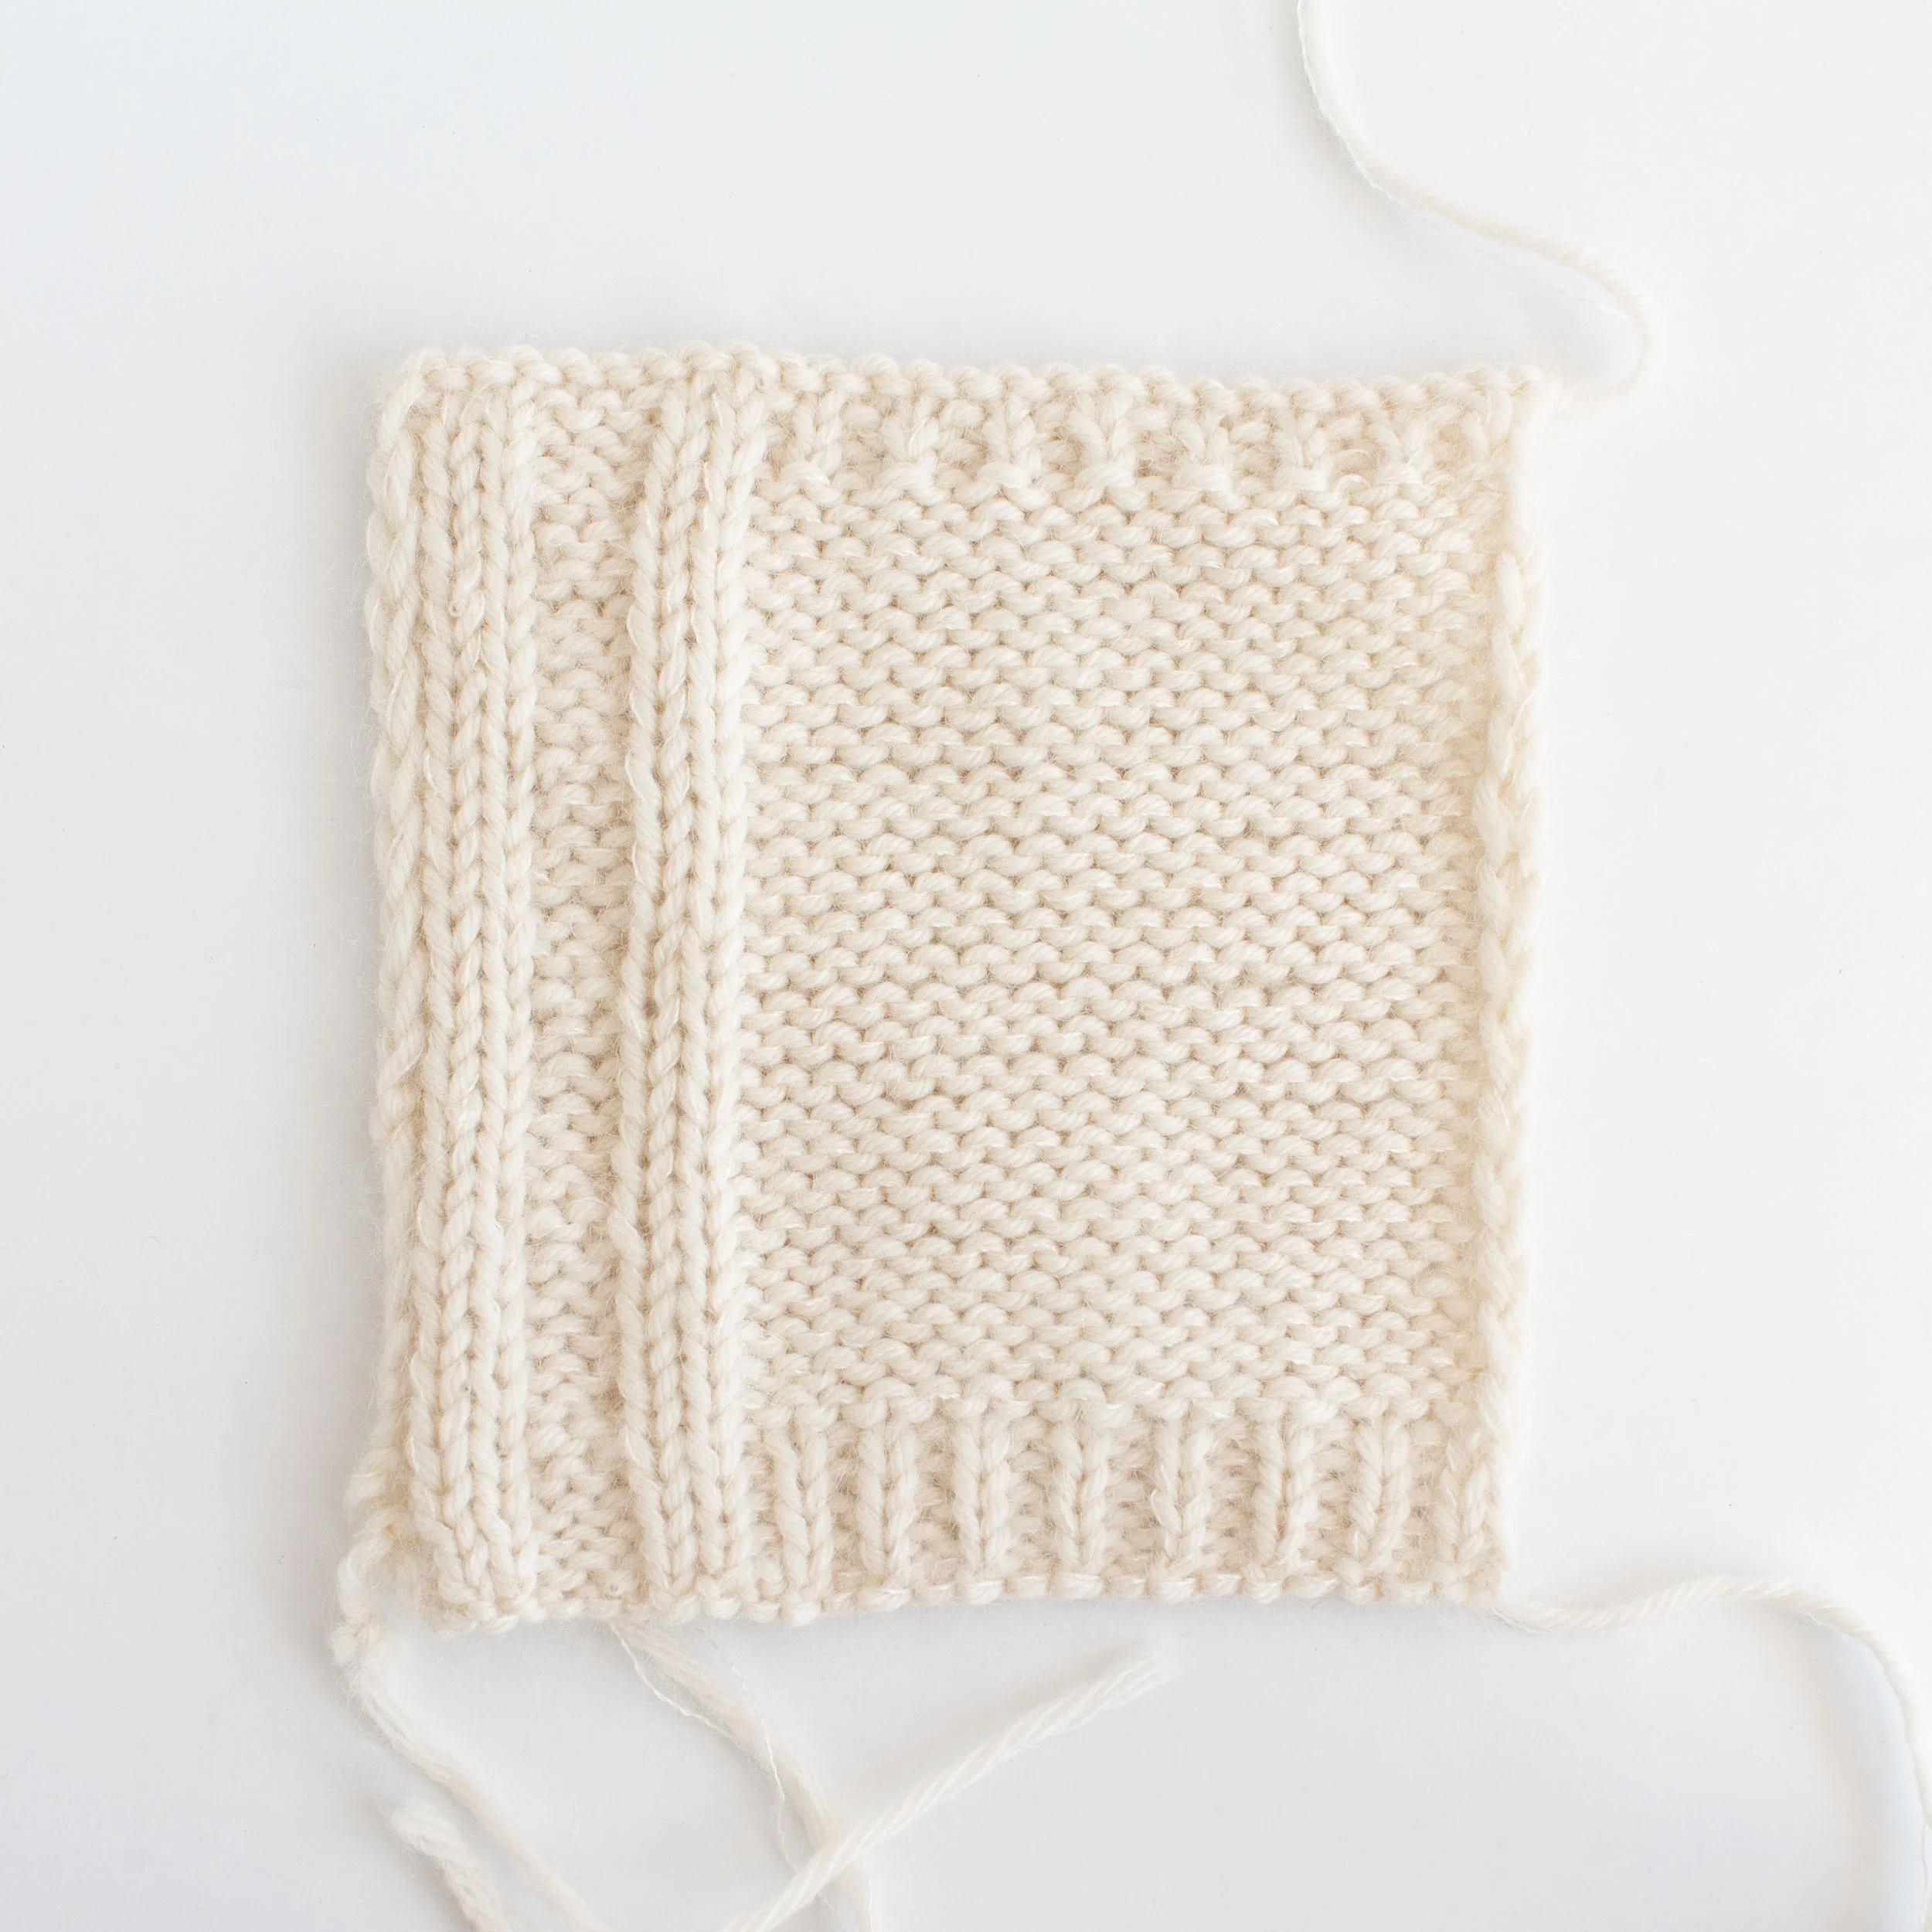
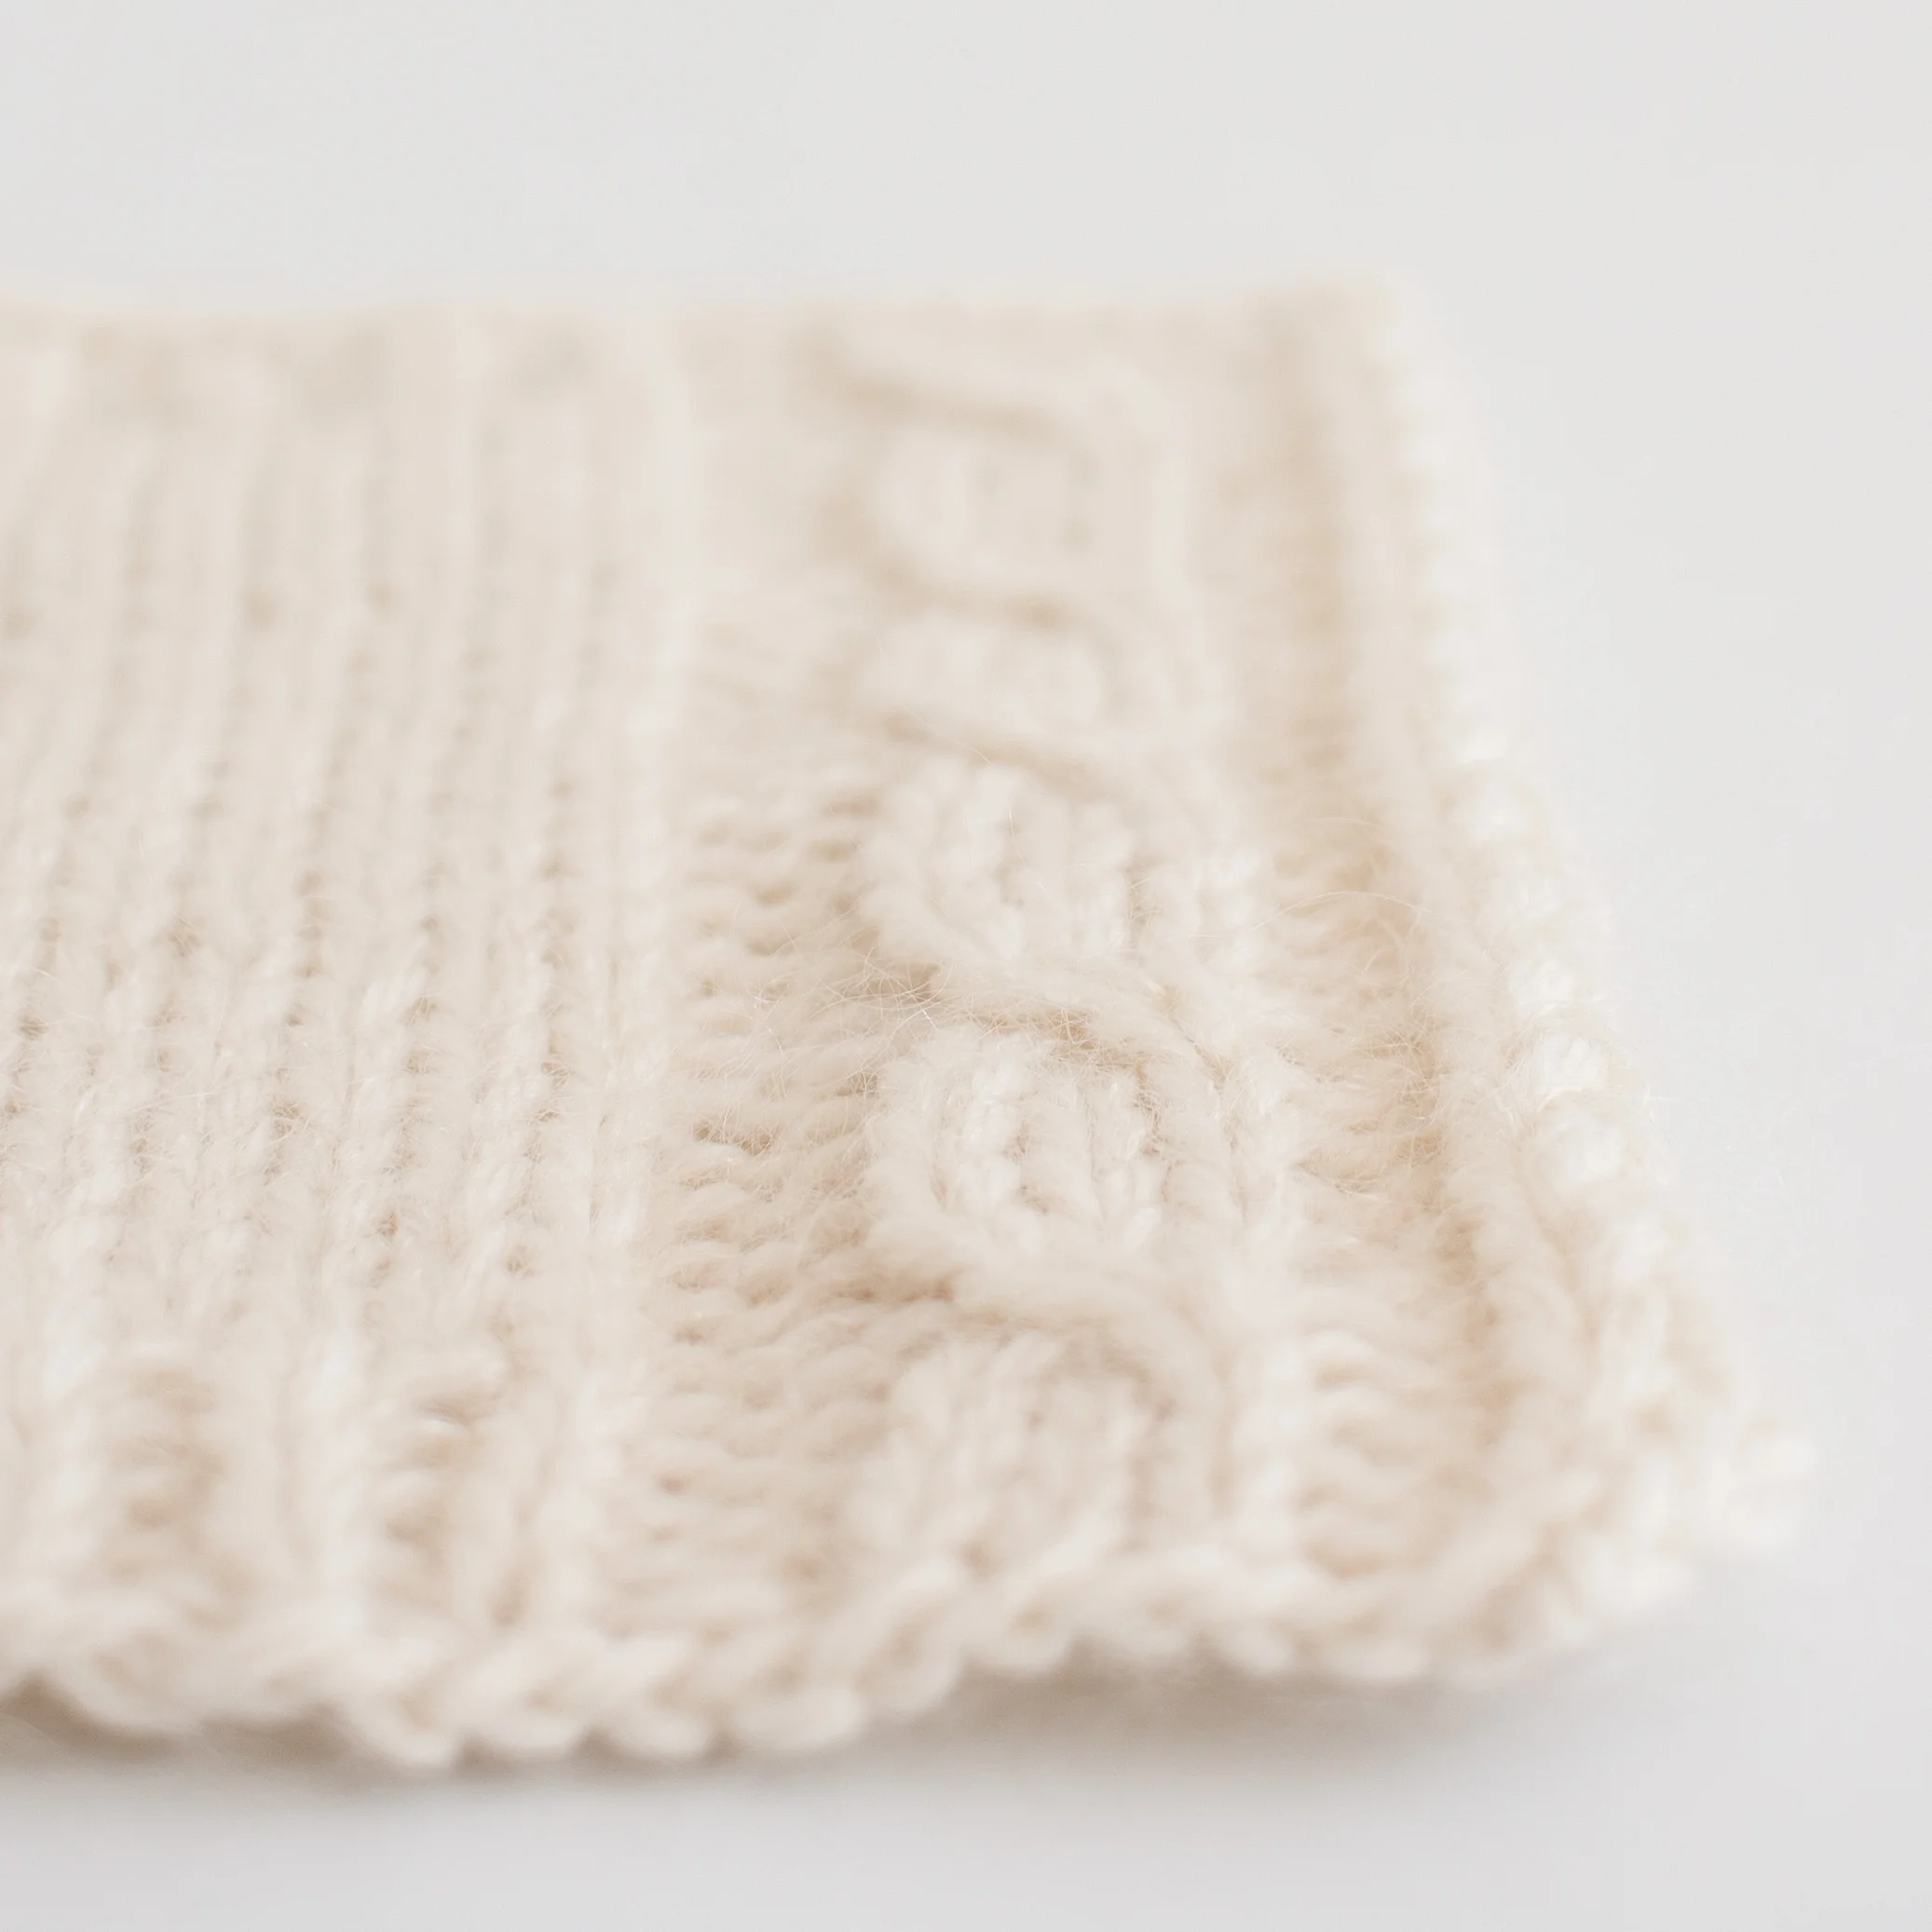
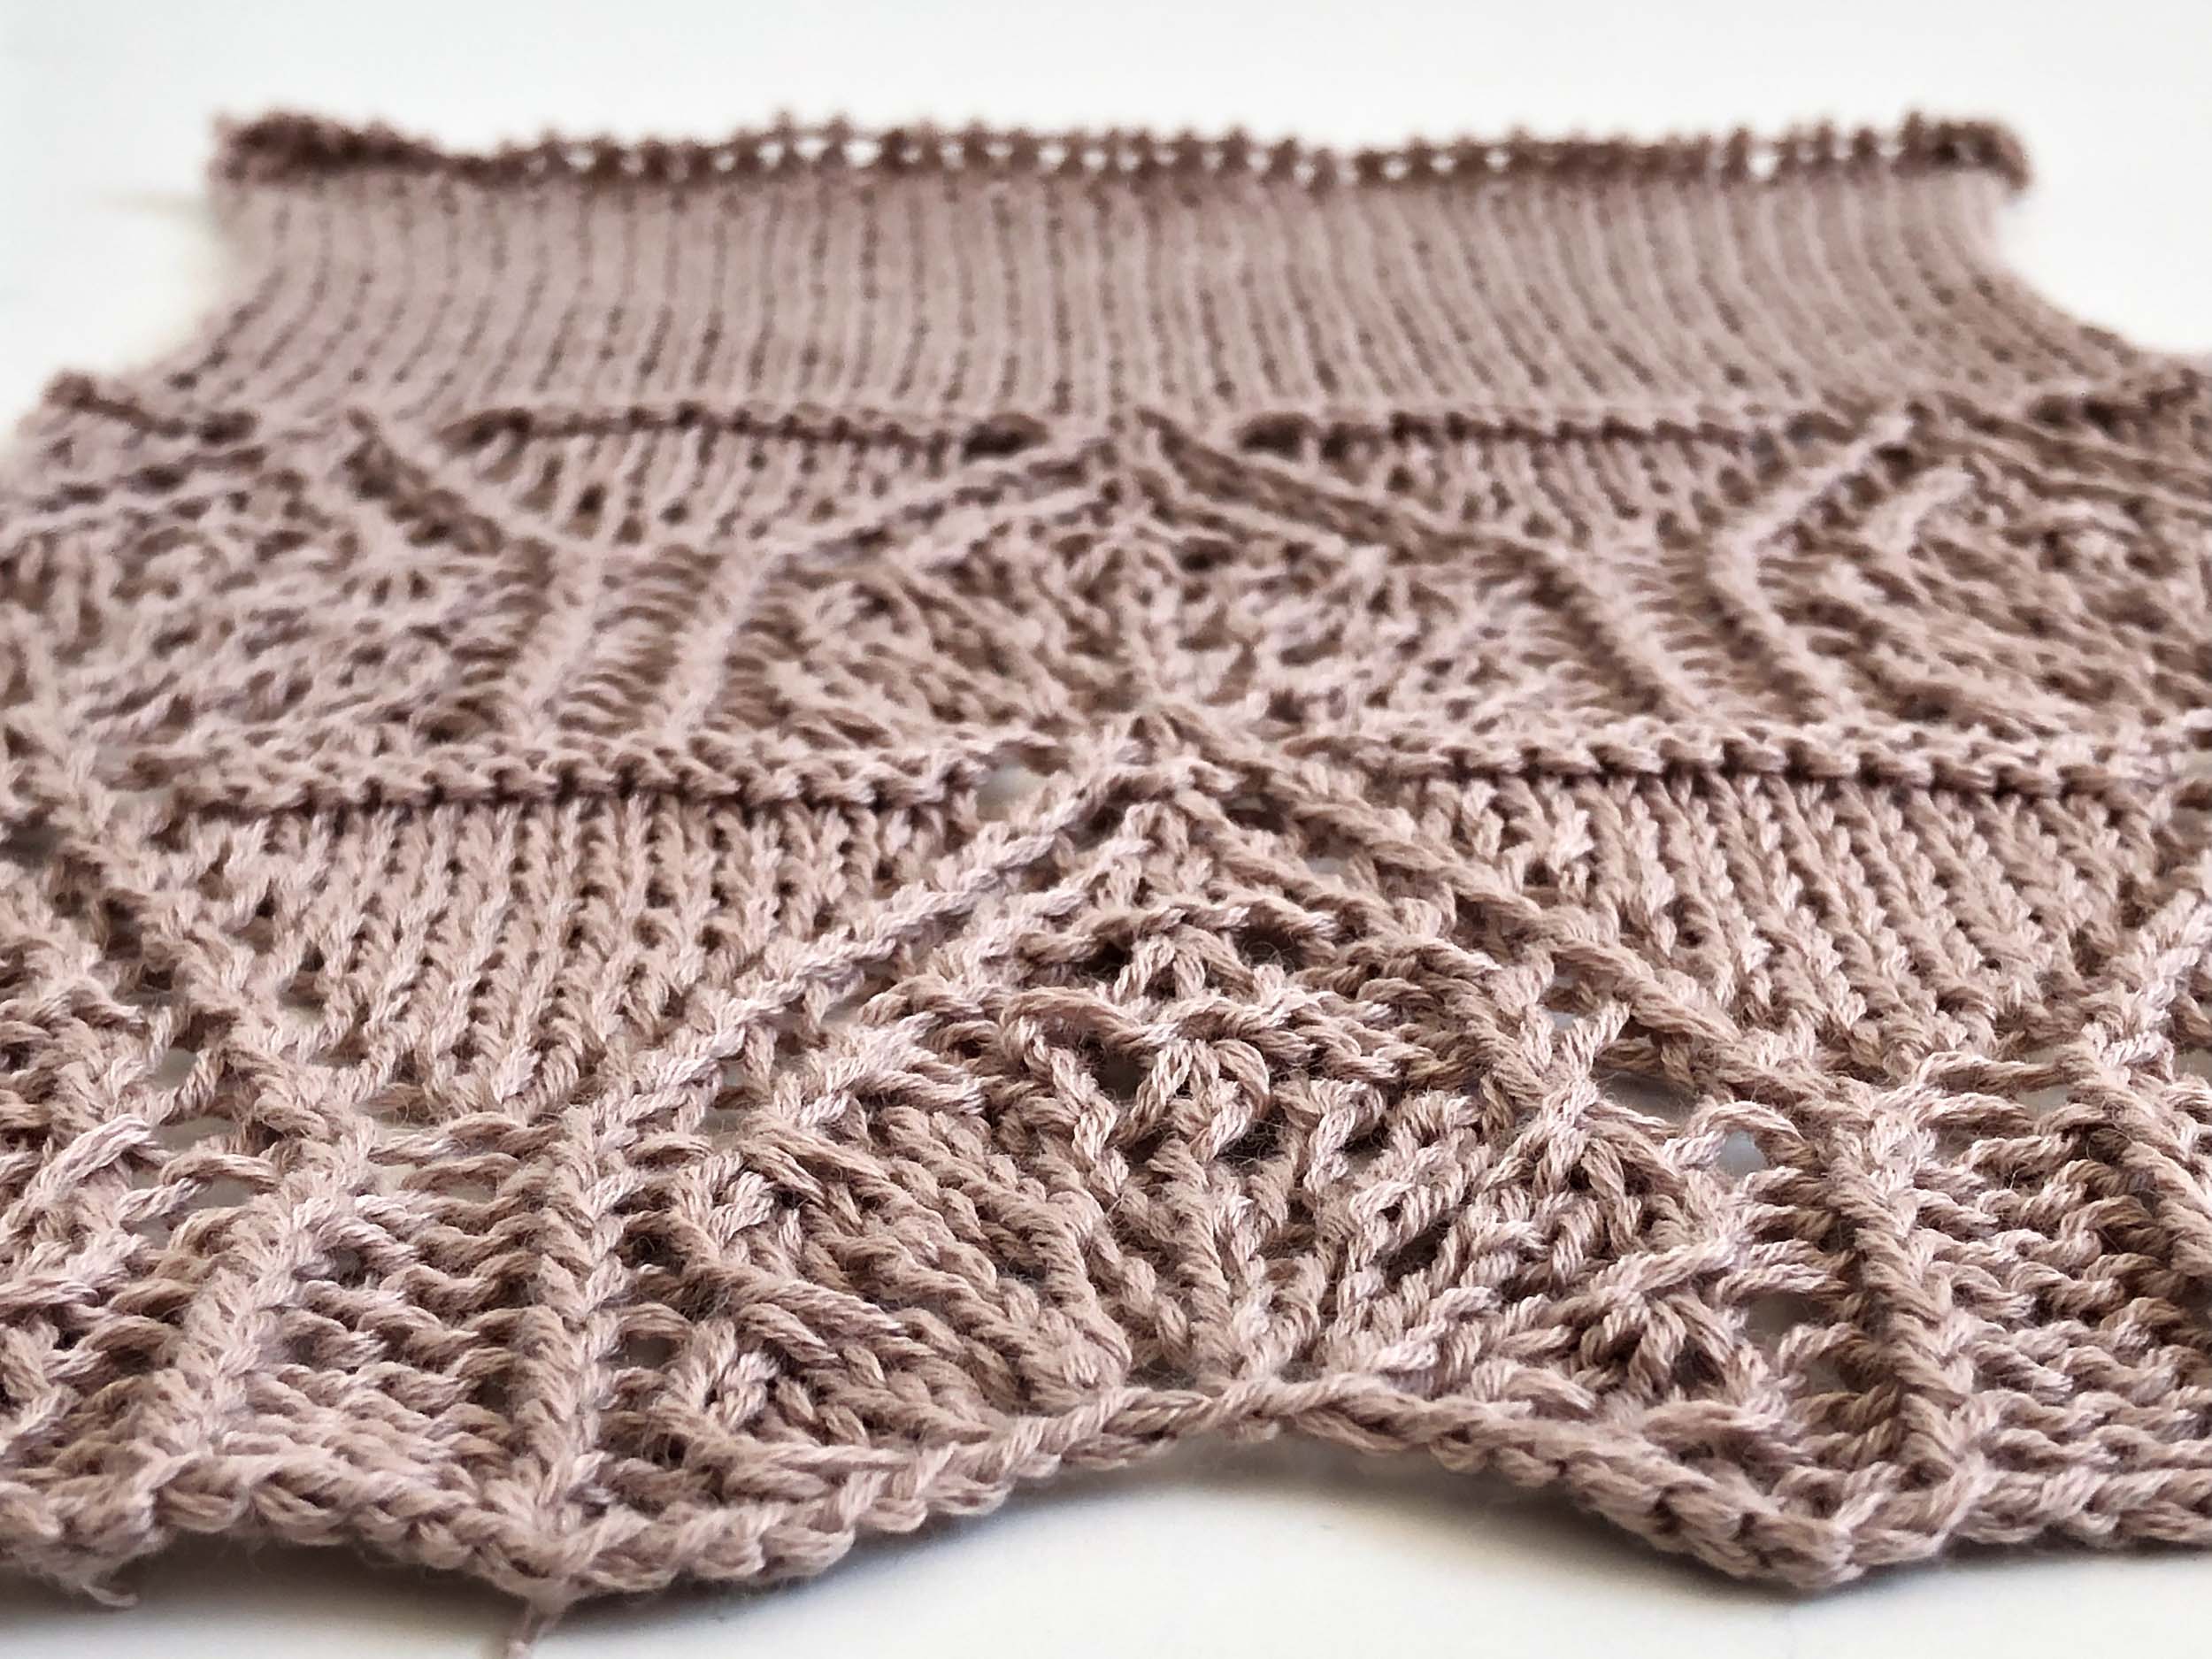
  • I knit a mini swatch on 5mm needles. I was happy with the resulting fabric. I didn’t fuss about gauge as the pattern was quite modular and could be made larger or smaller if needed.

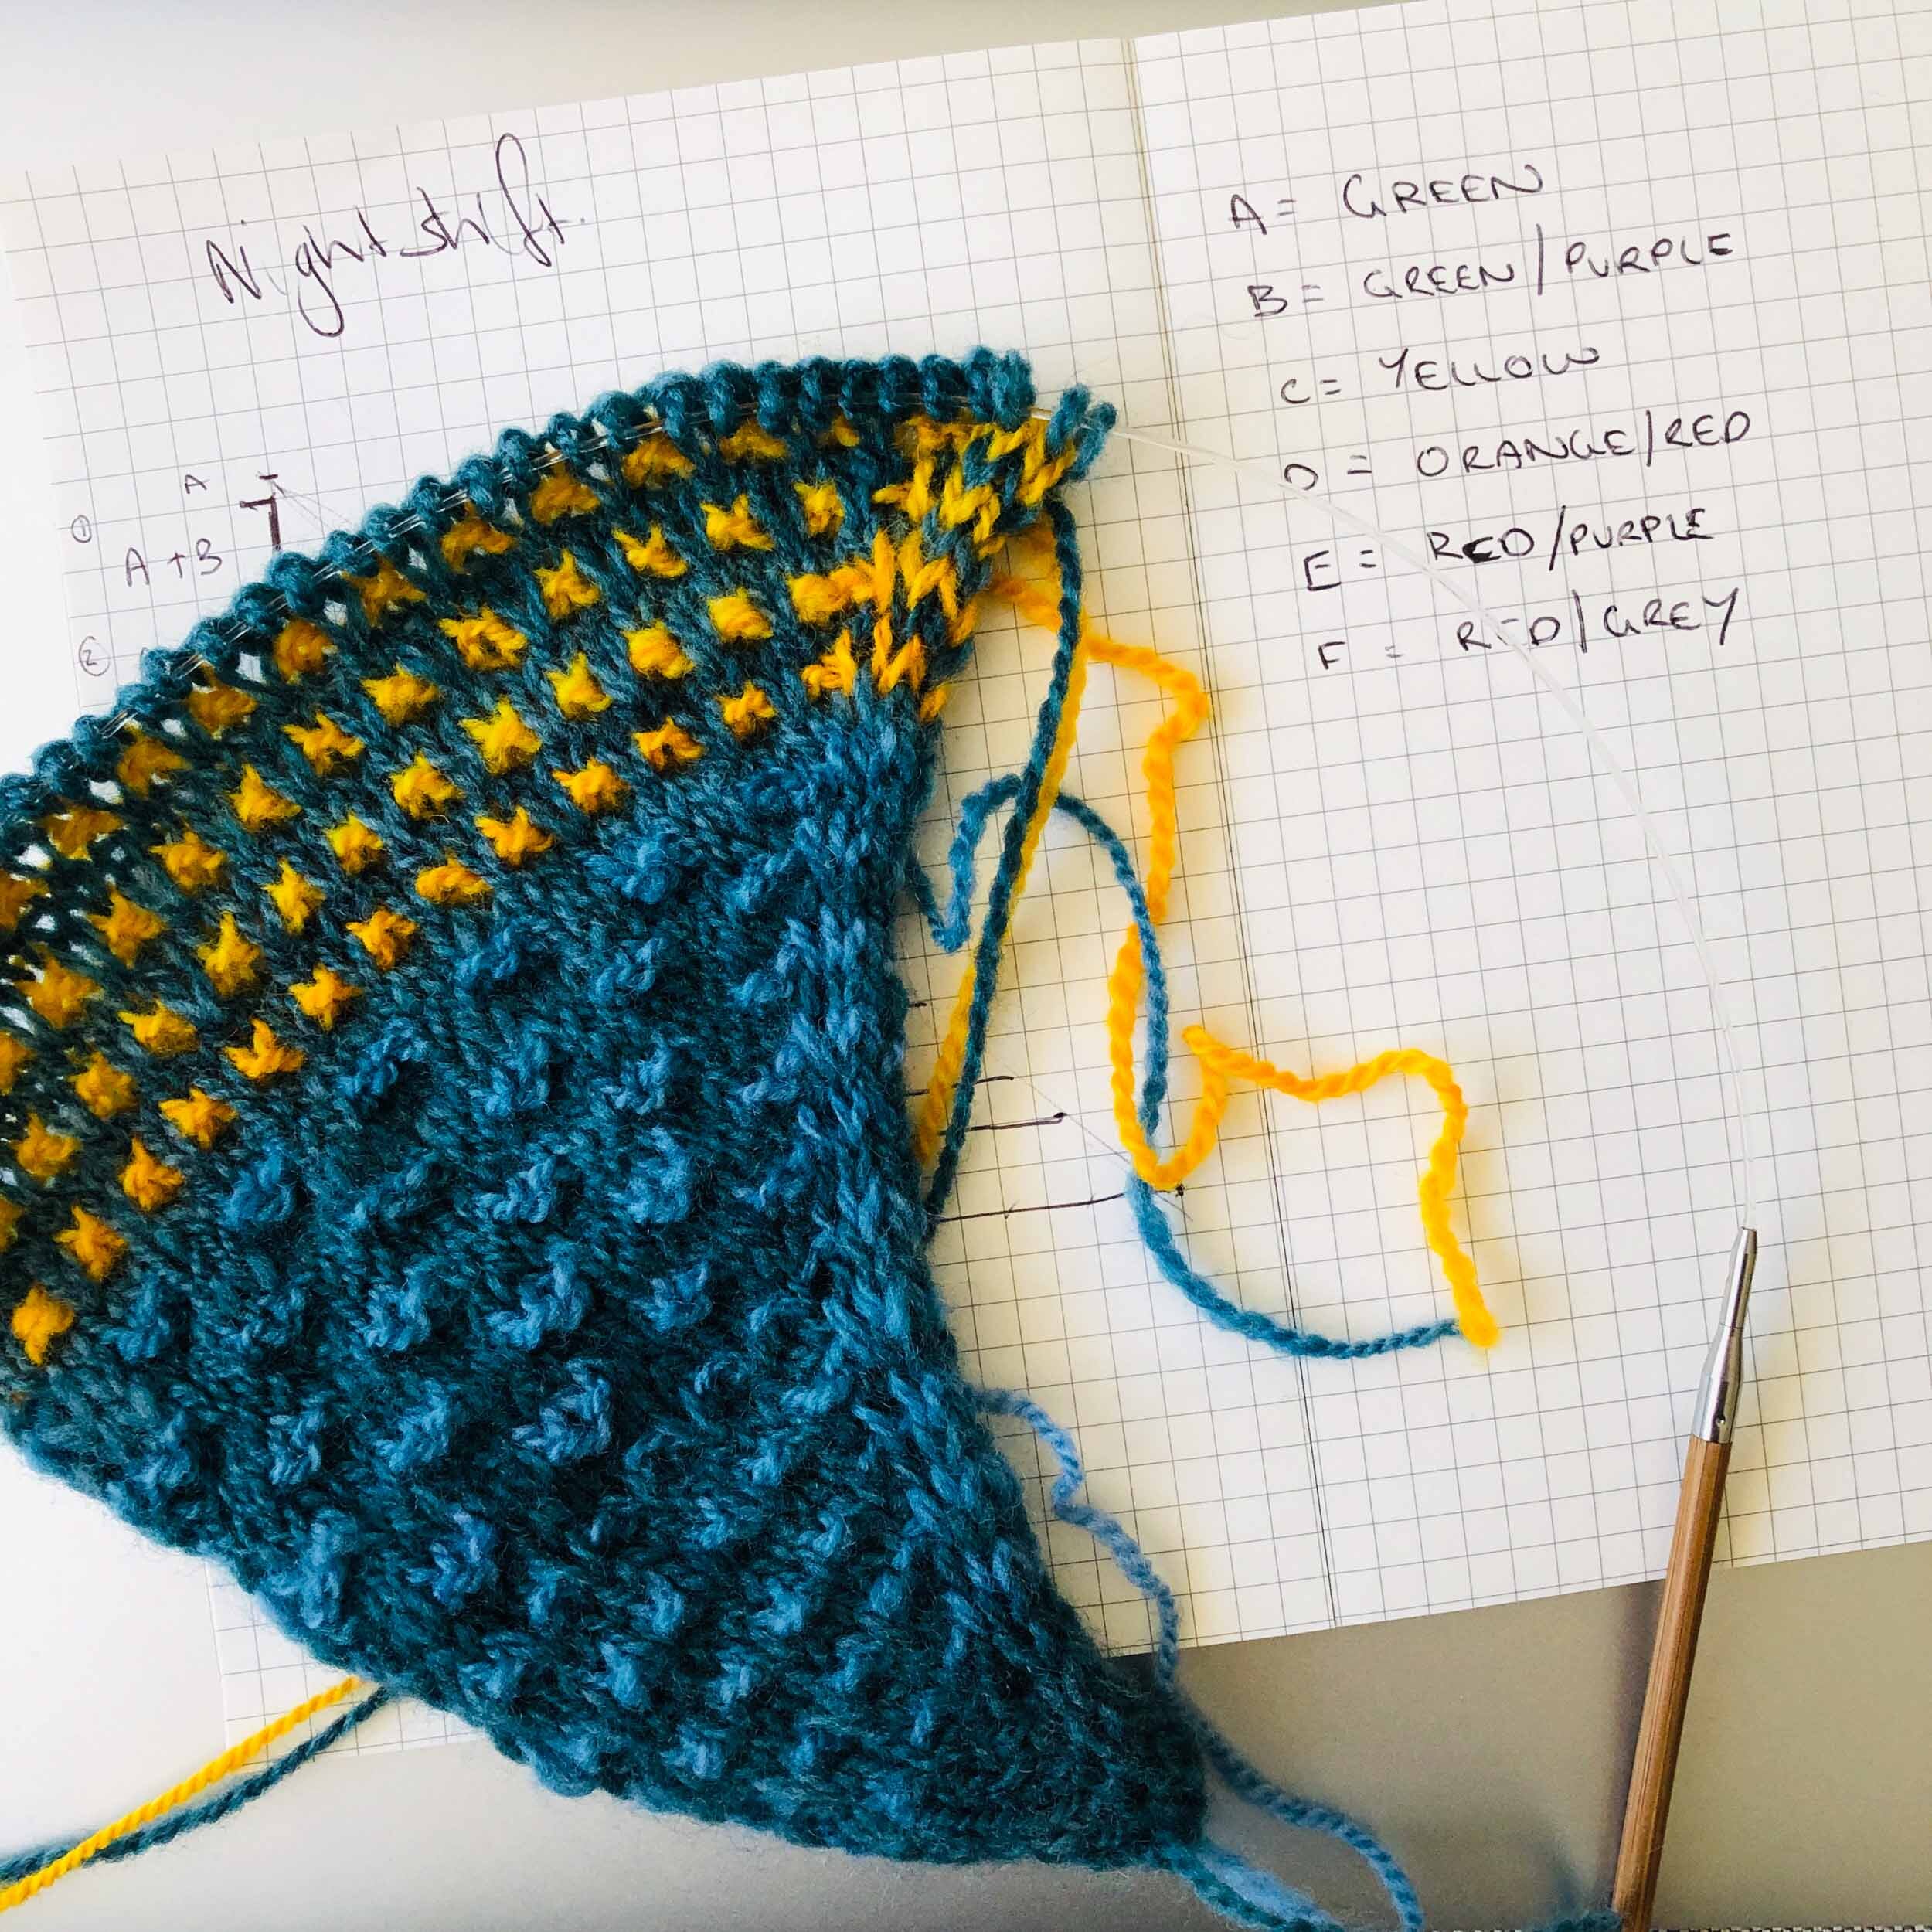
  • The pattern was worked as written using Mowry’s suggested colour changes, with the exception of one colour repeat towards the end where I knit 10 extra rows.

  • My colours correspond to the pattern colours as follows:

    • Colour A – Green

    • Colour B – Green/Purple

    • Colour C – Yellow

    • Colour D – Orange/Red

    • Colour E – Red/Purple

    • Colour F – Red/Grey

    • Bound off in C and D.

Nightshift Shawl - Pattern by Andrea Mowry - Studio Project by Loom & Spindle-30.jpg

FINISHING

To finish, the shawl was immersed in a bath of cool water for around 10 minutes, the water was drained, and the shawl pressed between towels to remove the excess. The piece was pinned out on a blocking matt, attention given to the triangular shaping of the shawl.

Once dry the gauge measured at: 

  • 20 stitches over 10cm (4'')

  • 28 rows over 10cm (4'')

 Total yardage:

  • I’m not really sure as I didn’t do any strict yardage calculations before I started. Though, think I have enough left over to make a beanie!

Final measurements:

  • Wingspan - 65”/165 cm 

  • Centre Depth - 31”/79 cm

Nightshift Shawl - Pattern by Andrea Mowry - Studio Project by Loom & Spindle-14.jpg

INSIGHTS AND OPPORTUNITIES

FIBRE AND COLOUR SELECTION

  • The Nightshift was such a great stash buster, I was truly in my happy place mixing and matching fibres for this project.

  • I was immediately drawn to the warm saturated shades of some of my most treasured braids, I was delighted when the final palette came together.

THE SPIN

  • The worsted weight yarn spun up very quickly, I had everything spun up in under a month!

  • I felt that it was important to complete all the spinning before I started knitting for this project in order to determine colour placement within the knitted shawl. 

FABRIC AND HANDFEEL

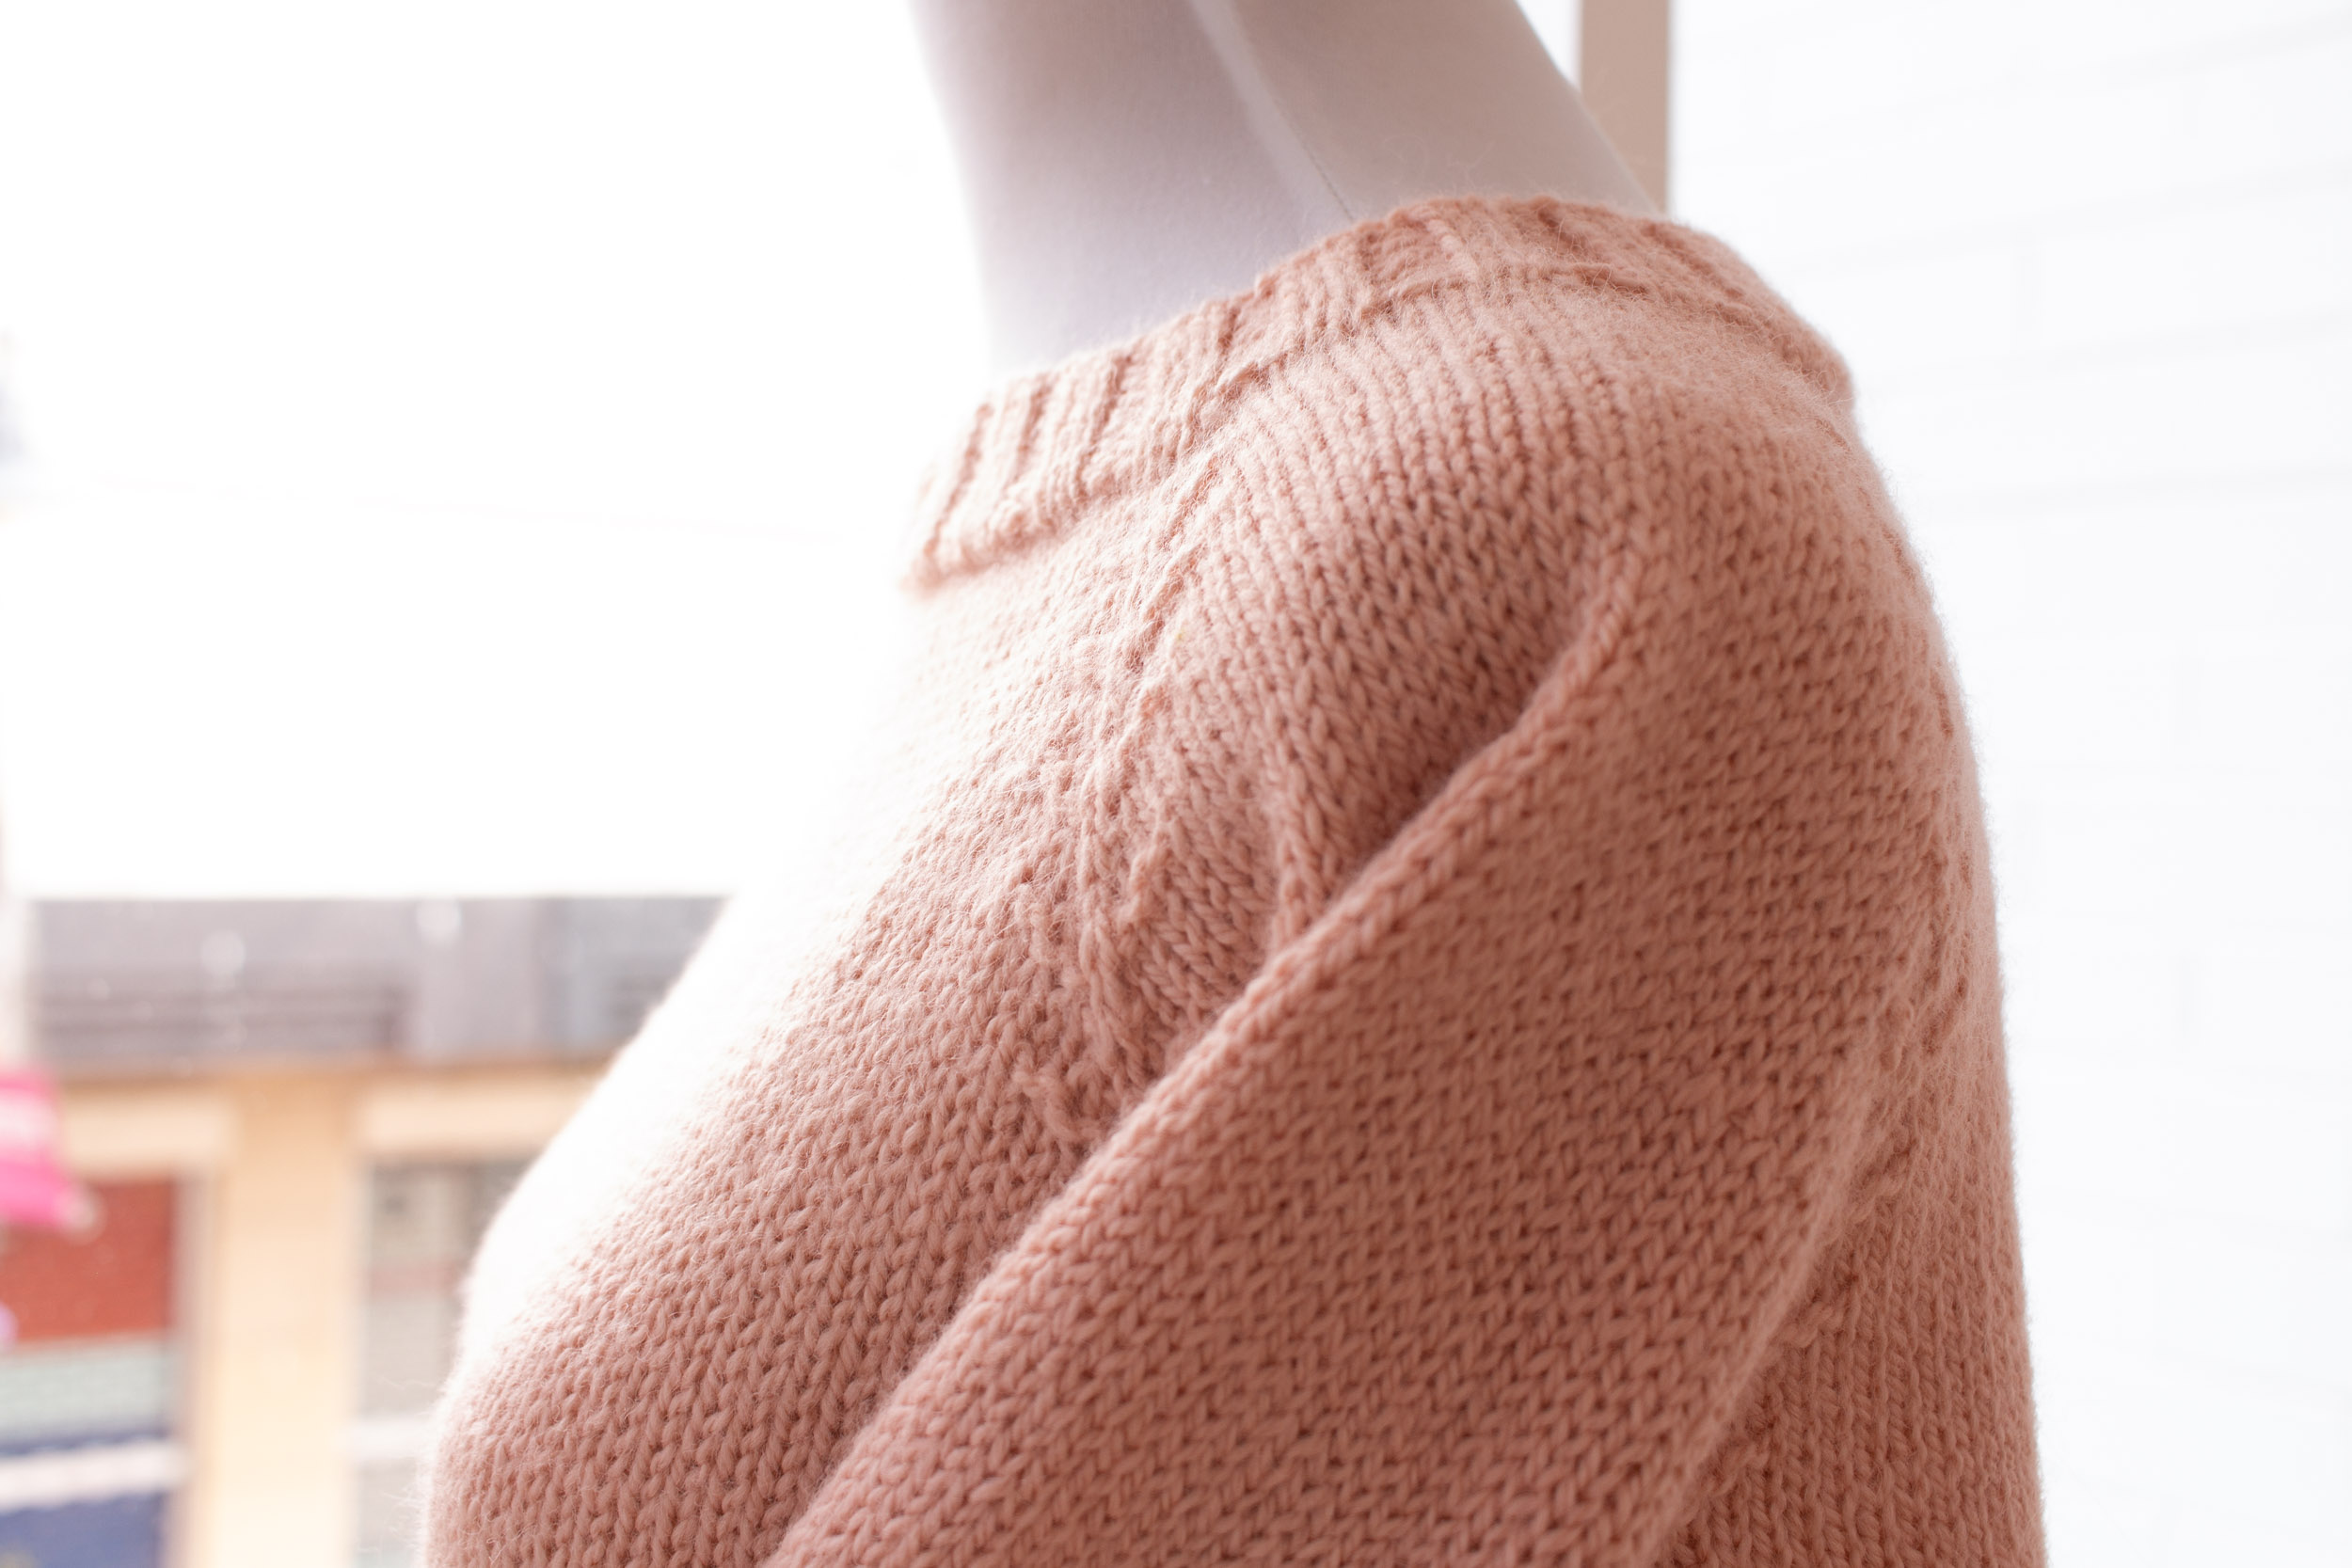
  • I certainly wasn’t disappointed by the merino and Merino X fibres. They made for bouncy squishy yarns and a light and lofty shawl.

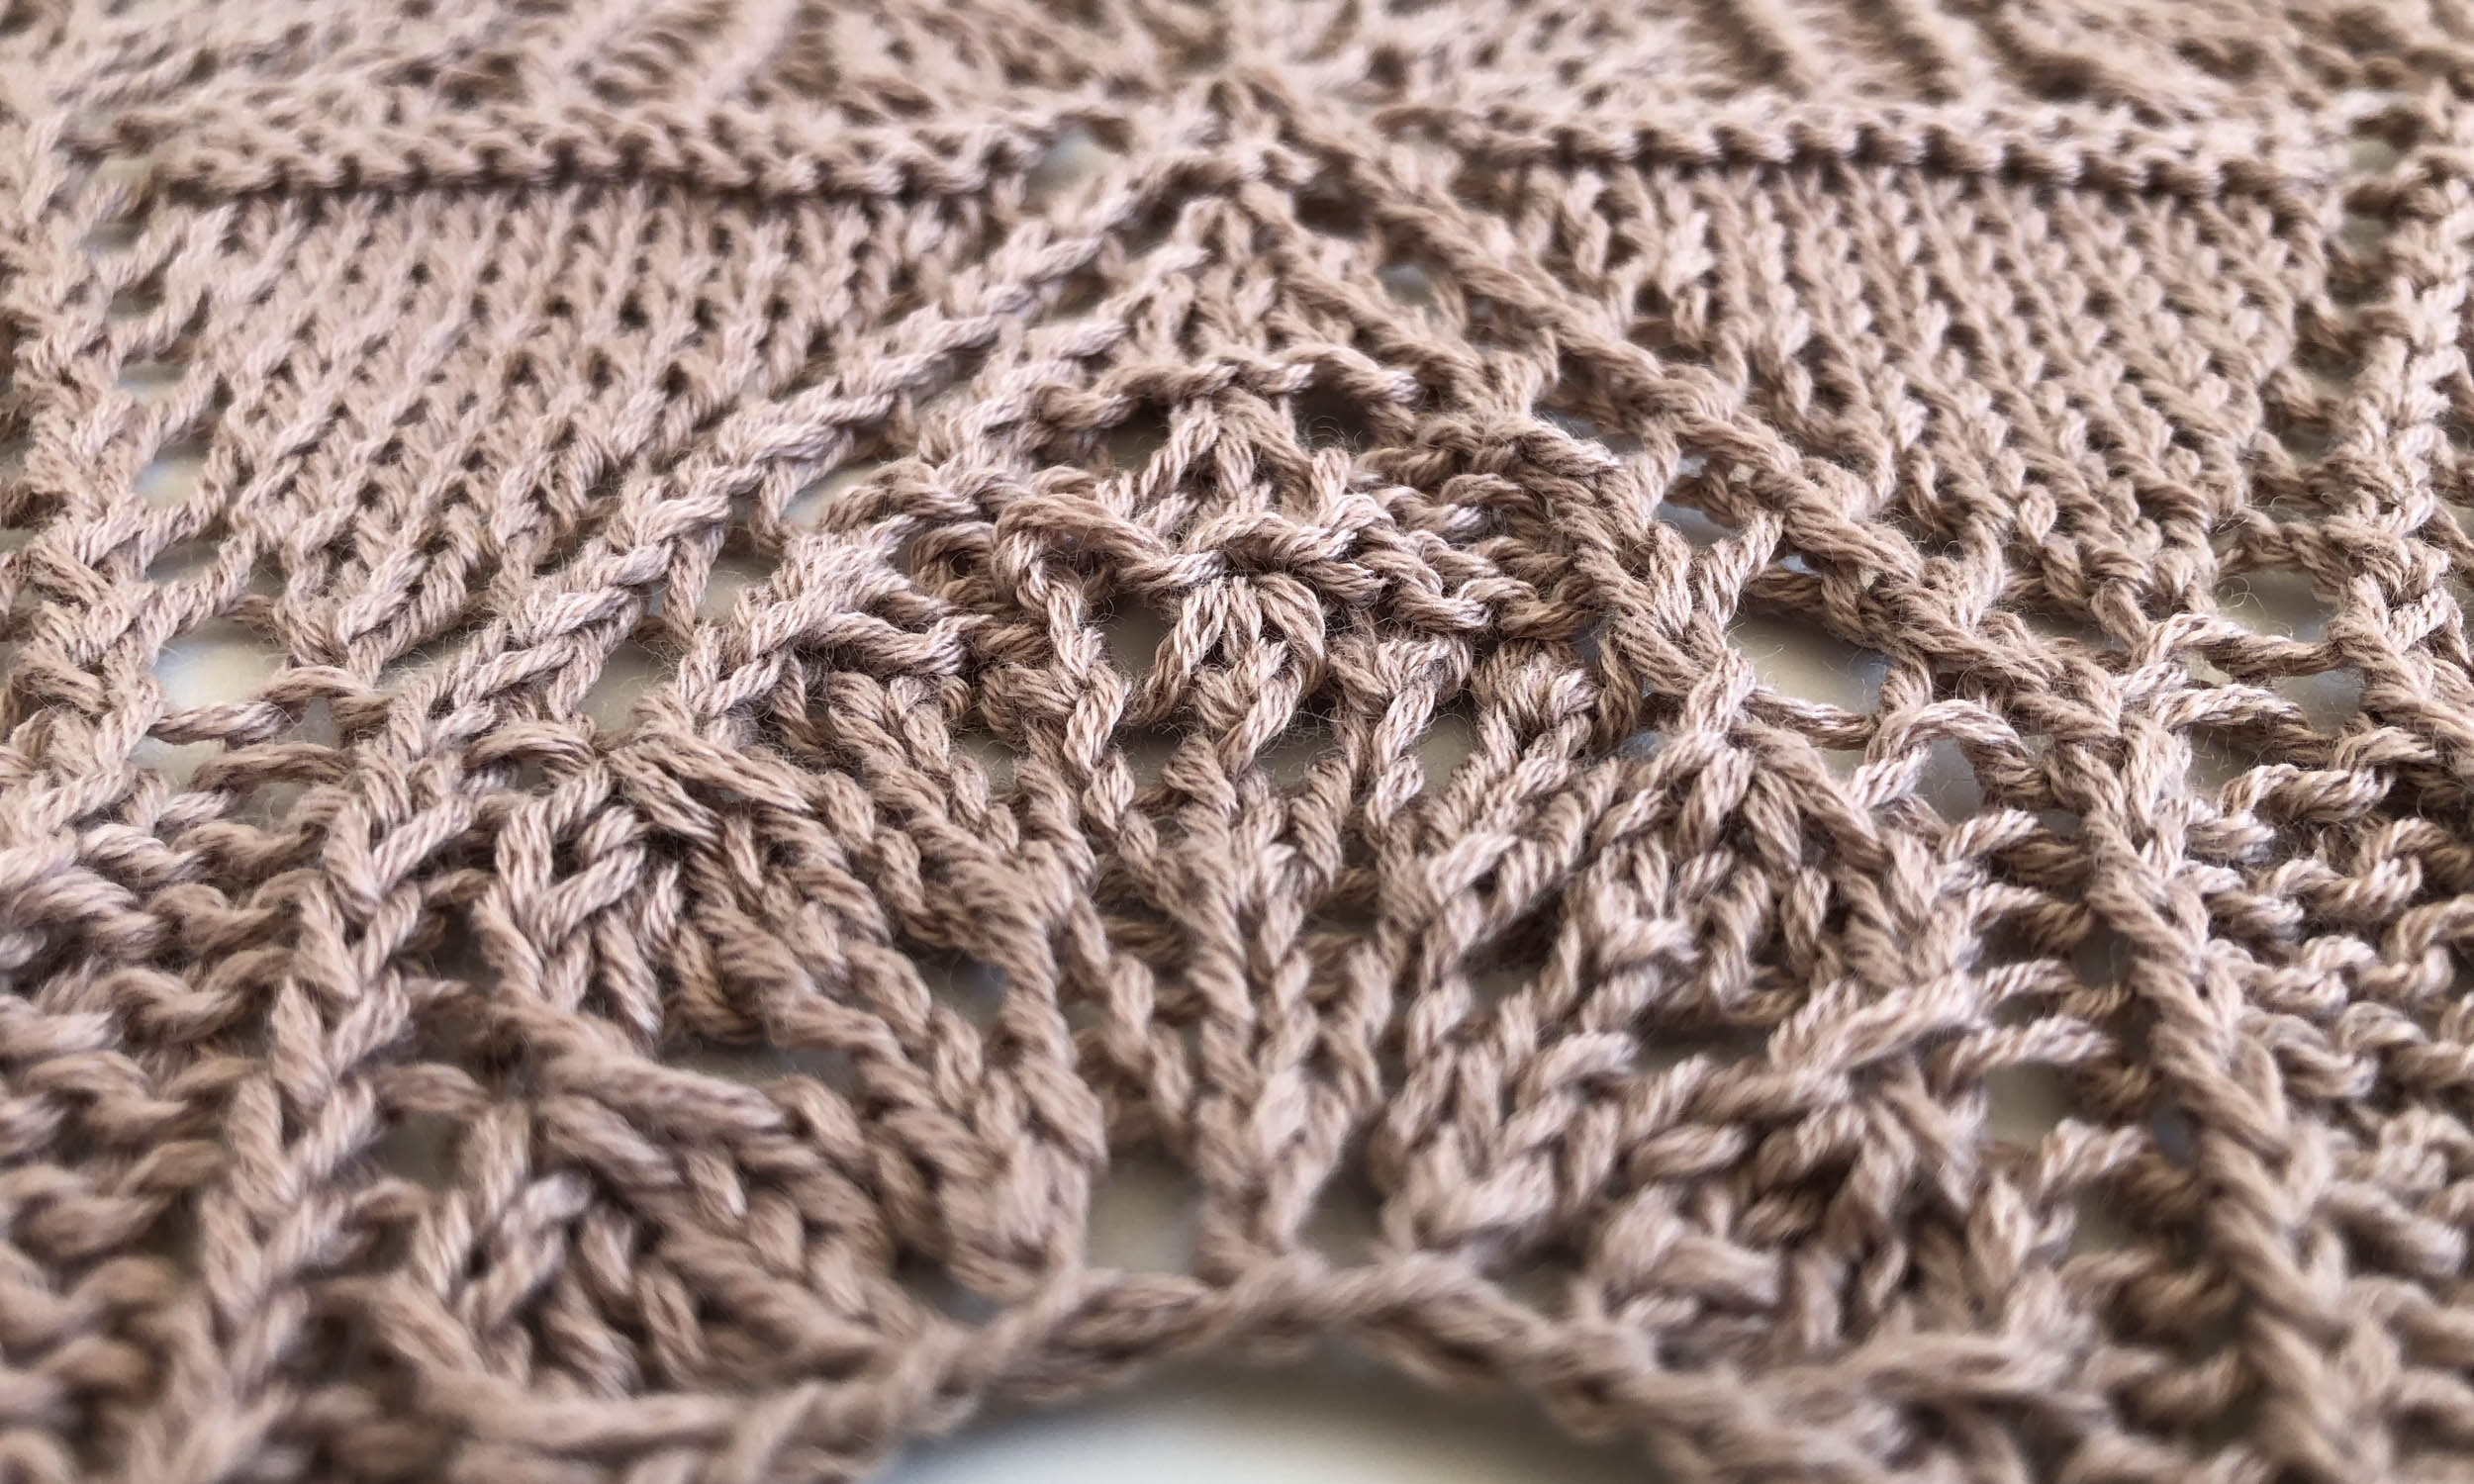
  • From far away you could easily say it’s just a colour block shawl, but with Mowry’s clever repeating mosaic stitch pattern the resulting fabric is a kaleidoscope of colour with subtle gradients over every row that I could study for hours.

Nightshift Shawl - Pattern by Andrea Mowry - Studio Project by Loom & Spindle-10.jpg
Nightshift Shawl - Pattern by Andrea Mowry - Studio Project by Loom & Spindle-17.jpg

FINAL THOUGHTS

  • There’s good reason why this pattern has 3800+ projects on Ravelry. The colour-play is highly engaging, and the piece works up quickly as you’re always itching to get to the next colour section.

  • The modular stitch repeat makes for a forgiving pattern, handy when yardage or gauge is not always spot on.

  • The colour shifting characteristics of hand-spun yarn make it the perfect substitution for the patterns suggested yarn.

  • Knitting with your hand spun yarn and feeling every bump and seeing every colour change is so satisfying. I would highly recommend all skill levels giving it!

Nightshift Shawl - Pattern by Andrea Mowry - Studio Project by Loom & Spindle-7.jpg

THANK YOU FOR READING!

Would you like to save this project for later? Add it to your Ravelry favourites HERE.

STAY IN THE LOOP

RECEIVE UPDATES FROM OUR STUDIO, PROJECT INSPIRATION AND PRODUCT NEWS BY JOINING THE LOOM & SPINDLE COLLECTIVE.

Nightshift Shawl - Pattern by Andrea Mowry - Studio Project by Loom & Spindle-2.jpg
 

Explore Spinning…

You may also like…

Field Notes on Working Three-Colour Colourwork
Loom & Spindle - The Throwback Swatch-8.jpg

Upon its release last year we were instantly drawn to Andrea Mowry’s The Throwback - a top-down knit cardigan with cool retro-inspired colourwork detail around the yoke.

We thought the unique woolly texture and warming heathered shades of Loch Lomond GOTS would be a perfect match, so we got swatching. 

Translating and working Mowry’s design into a swatch was easy enough until we hit the three-colour colourwork... worked flat!

Though we had some initial hesitation, we were up for the challenge.

We’ve detailed our swatch notes below, including a little trick we found for controlling that third unruly yarn.

Enjoy!


PROJECT

Swatching The Throwback by Andrea Mowry in Loch Lomond GOTS by BC Garn

Loom & Spindle - The Throwback Swatch-1.jpg

AIM

To explore:

  • The fabric’s hand-feel at the resulting gauge

  • The suitability of Loch Lomond GOTS for colourwork, and

  • A method for working three-colour colourwork

SKILLS

  • Casting on

  • Casting off

  • Knitting flat

  • Reading charts for colourwork

  • Familiarity with different knitting styles:

    • Continental (yarn held in left hand)

    • English (yarn held in right hand)

TOOLS

  • 4 mm (US 6) circular needles (we used Chiaogoo Spin Bamboo Interchangeables)

MATERIALS

Colour A, Moss

Colour B, Beige


Colour C, Curry

Colour D, Fire Red


PATTERN

The swatch is for The Throwback sweater pattern published by Andrea Mowry of Drea Renee Knits. This pattern is available for purchase on Ravelry or at dreareneeknits.com.

The pattern provides a gauge of 18.5 stitches and 26 rows over 10cm (4'').

Loom & Spindle - The Throwback Swatch-11.jpg

PROCESS

THE DESIGN

Casting on 38 stitches, we started with a base of 4x4 rib running into stocking stitch to test Loch Lomond GOTS in the knitted fabric.

The colourwork chart was incorporated to explore the relationship between the yoke detail and chosen colour palette.

 
Loom & Spindle - The Throwback Swatch-4.jpg
 

THE SWATCH

We tried a few different needle sizes on some pre-swatch swatches. We found a satisfactory fabric was obtained on 4mm (US 6) needles, with a resulting 5 stitches per inch pre-blocking.

For the colourwork component we began by working the two-colour sections with one yarn held in each hand and catching the floats behind the work at regular intervals.

Having had some experience working the yarn from both the left and right hands, this method was quite comfortable for us and we had no trouble working either the knit or purl sides of the fabric.

THE THREE-COLOUR SECTION

Applying our colourwork method to the three-colour sections proved more challenging.

When working with a third yarn (in either hand) we found it difficult to maintain tension, catch floats evenly across the back (particularly on the purl side) and avoid disastrous tangles between the three strands.

After a few attempts at using various stranding techniques and re-organising our yarns we settled on a method that simply removed the problem!

Our solution… working only two colours across the row and slipping the stitch that required the third colour. The row was then worked again, slipping the previously worked stitches and only knitting the stitches required to complete the three-colour sequence.

This simplified working the purl-side, as the colour pattern was already established from working the knit-side and could simply be repeated – purling with two colours across the row, then working the row again with the third.

Given only six rows of the chart are worked in three-colours we found this to be a quick and easy solution.

FINISHING

The swatch was soaked in a bath of cool water for around 5 minutes, the excess water pressed out using a towel. The swatch was pinned out on a blocking matt, attention given to aligning the stitches and smoothing out the colourwork.

The final measurements:

  • Overall dimensions, 18cm x 20cm (7'' x 8'')

  • Gauge, 20 stitches and 24 rows over 10cm (4'')

INSIGHTS AND OPPORTUNITIES

GAUGE

Though we didn’t quite reach the pattern’s gauge, our measurements indicate that this yarn would be a viable option for The Throwback. A quick calculation tells us that we would only need to go up one size to accommodate the variance.

Here’s what we did (using inches for simplicity):

Our size - Size 3, Bust 43''
Our gauge - 5 stitches over 1''

Number of stitches required for our size:

43 (bust size) * 5 (our gauge) = 215 stitches (around the bust)

At Size 3 (bust 43'') and the pattern gauge of 4.6 stitches over 1'', we would have too few stitches:

43 (bust size) * 4.6 (pattern gauge) = 198 stitches (around the bust)

198 (no. stitches at Size 3) / 5 (our gauge) = 39.6'' Bust

At Size 4 (bust 47'') and a pattern gauge of 4.6 stitches over 1'', we get a close match:

47 (bust size) * 4.6 (pattern gauge) = 216 stitches (around the bust)

216 (no. stitches at Size 4) / 5 (our gauge) = 43.2''

Therefore, our corresponding size with the required stitch count is Size 4!

FABRIC

Loch Lomond GOTS bloomed to produce a smooth and homogenous fabric with well-defined colourwork detail.

The woolly texture and tweedy appearance make for a wonderfully rustic hand-feel that is both light and warm to the touch.

FINAL THOUGHTS

This little swatch was an experiment that quickly became a great lesson in working three-colour colourwork.

The colourwork method we used was particularly suited to this project given the piece is worked flat with the three colour sections only occurring over six rows.

Ultimately, giving ourselves the space to explore and experiment via swatching took away any initial apprehension we had and gave us the confidence to tackle the larger project in the future.

Loom & Spindle - The Throwback Swatch-7.jpg

THANK YOU FOR READING!

Would you like to save this swatch for later?

Add this swatch to your Ravelry favourites HERE.


+ Subscribe to the Loom & Spindle e-newsletter and get a 10% discount on the Loch Lomond GOTS range!


Keep on swatching…

You may also like…

Knitting Lydia Gluck’s Woodwardia Pullover
Loom & Spindle - Woodwardia Swaeter-1.jpg

A Spring Project

Heading into Spring we’re enjoying the warming weather. Though, with crisp mornings and cool evenings we’re still seeking out layering pieces to transition the day.

The Woodwardia pullover by Lydia Gluck (co-founder & editor of Pom Pom Quarterly) is the perfect spring staple. With its relaxed fit and understated silhouette, it offers both comfort and warmth all with a lightness in hand.

We recently added this piece to our spring wardrobe, having worked it up in Hamelton No. 1 by BC Garn. With its top-down in-the-round construction and botanical design details it was an enjoyably simple knit.

Below, we take a closer look at some of the finer details of Woodwardia and review Hamelton No. 1.

Enjoy!


PROJECT

Knitting Woodwardia By Lydia Gluck in Hamelton No. 1 by BC Garn

Loom & Spindle - Woodwardia Swaeter-2.jpg

AIM

Knit the Woodwardia pullover to explore:

  • Top-down, in-the-round construction

  • Knitting with Hamelton No. 1, its suitability and yarn characteristics, and

  • The resulting fabric and hand-feel

SKILLS

  • Knitting in the round

  • Simple increases and decreases

  • Casting off in pattern

  • Wet blocking

TOOLS

  • Body: 4.5mm (US 7) circular needles (we used Chiaogoo Spin Bamboo Interchangables)

  • Ribbing: 4mm (US 6) circular needles (we used Chiaogoo Spin Bamboo Interchangables)

MATERIALS

Loom & Spindle - BC Garn - Hamelton 1 - Baby Pink-2.jpg

Hamilton No. 1 by BC Garn
Colourway BABY PINK (112)


PATTERN

The Woodwardia pullover pattern by Lydia Gluck was first published in Pom Pom Quarterly, Issue 28: Spring 2019 and subsequently in Ready Set Raglan in 2020. It is available to purchase HERE, on RAVELRY or the POM POM website.

Loom & Spindle Woodwardia Pattern.jpg

Process

The pattern was worked as written with one design modification to the neckline.

Loom & Spindle - Woodwardia Swaeter-14.jpg

SIZE

We knit a size 3 for a finished bust circumference of 120cm (47.25'') – to be worn with 20cm (8'') positive ease.

SETUP

We knit the pattern as written for the body and sleeves and modified the neckline.

MODIFICATIONS

As the Australian spring can be relatively temperate we thought the rolled neck collar might be a bit too warm for our climate.

We opted for crew-neck style neckline. The modification was simple, we followed the instructions for the collar as written and cast-off in pattern after 9 rows of ribbing was complete.

Adding short rows to the back neck was briefly considered. However, having tried on the pullover before the neckband was started it was deemed unnecessary as the neckline was quite generous and sat evenly around the shoulders.

Loom & Spindle - Woodwardia Swaeter-3.jpg
Loom & Spindle - Woodwardia Swaeter-6.jpg
Loom & Spindle - Woodwardia Swaeter-8.jpg
Loom & Spindle - Woodwardia Swaeter-7.jpg

FINISHING

To finish, the garment was immersed in a bath of cool water for around 10 minutes, the water was drained and the pullover pressed in a towel to remove the excess. The piece was pinned out on a blocking matt, attention given to shaping the jumper to the dimensions provided in the pattern and aligning the stitches.

Once dry the gauge measured at:

  • 18 stitches over 10cm (4'')

  • 28 rows over 10cm (4'')

 The total yarn used:

  • 482g (17oz) / approx. 964m (1054y), or

  • 10 balls Hamelton No. 1

Loom & Spindle - Woodwardia Swaeter-17.jpg

INSIGHTS AND OPPORTUNITIES

CONSTRUCTION

Being comfortable reading knitting patterns, we found the top-down in-the-round construction easy to follow. And, being familiar with the pattern skills, the garment was straightforward to knit. The purl stitch detail on the raglan sleeves was intuitive and easy to remember.

Though the styling was simple, the design included some smart design elements for a relaxed and comfortable fit – lots of positive ease, a longer back hem and generous neckline.

Knit in a worsted weight yarn and with some dedication to the project the pullover worked up quickly.

Loom & Spindle - Woodwardia Swaeter-15.jpg
Loom & Spindle - Woodwardia Swaeter-16.jpg

THE PULLOVER

Using Hamelton No. 1 and the needle sizes suggested, we were able to achieve the gauge specified. The measurements of the finished garment matched those stated in the pattern. Yes!

Our modification - the crew neckline, sits flat and evenly around the shoulders. 

We came in just under 500g to complete the project. The resulting pullover is lightweight and warm, and we can confirm very wearable throughout the day!

Loom & Spindle - Woodwardia Swaeter-11.jpg

THE FABRIC

We love the look of Hamelton No 1 in the knitted fabric. The worsted 2-ply construction results in a somewhat textured surface, reminiscent of handspun yarn in hand-feel and appearance.

The slight lustre of the yarn remains bright in the fabric. We have experienced some pilling on the elbows, but this can be expected on a worsted spun 2-ply yarn with moderate twist. We think after a few brushes this will settle, making for a hard-wearing sweater.

Our tester did note a slight pique to the yarn. Though wearable against the skin, they did prefer to wear a long sleeve garment under this yarn.

Loom & Spindle - Woodwardia Swaeter-18.jpg

FINAL THOUGHTS 

For those new to knitting garments, the Woodwardia pullover would make a great introduction to top-down in-the-round construction.

The skills required, and the layout of the pattern would be approachable for those interested in extending their knitting skills.

Hamelton No. 1 produced a light yet warm fabric with interesting surface texture.

The piece itself is extremely wearable with lots of positive ease for layering-up on those spring days that start cool, and warm as the day progresses.

Loom & Spindle - Woodwardia Swaeter-13.jpg

THANK YOU FOR READING!

Would you like to save this project for later? Add it to your Ravelry favourites HERE.

Knitting Woodwardia? You’ll need a worsted / 10 ply weight yarn with the following meterage:

  • Size 1  - 730m

  • Size 2 - 845m

  • Size 3 - 940m

  • Size 4 - 1035m

  • Size 5 - 1130m

  • Size 6 - 1225m

  • Size 7 - 1345m

  • Size 8 - 1500m

  • Size 9 - 1590m

  • Size 10 - 1720m


Let’s Keep Knitting…

You may also like…

Swatching Grace by Denise Bayron
Loom & Spindle - Grace Swatch

An experiment stranding Semilla Grosso with Silky Kid

It’s been an exciting year here at Loom & Spindle, we’ve spent many happy hours sourcing unique yarns and fibres from all over the world to bring you a fresh palette of textures to explore. 

One of our new favourites is the GOTS certified, Semilla Grosso by BC Garn. A smooth round yarn with exceptional stitch definition.

We’ve been enjoying the process of swatching and planning projects with Semilla Grosso and we’re eager to share all our experiments with you.

Today we’re taking a look at our swatch for the Grace pullover by Denise Bayron, as featured in Laine Magazine Issue 8.

This swatch almost didn’t make the cut. Grace is knit in a super bulky weight yarn at 2.75 stitches per inch. At a standard gauge Semilla Grosso knits up much finer at around 3.5-4.5 stitches per inch. 

Our pre-swatching suggested that we just weren’t going to get gauge using Semilla Grosso, but we had one last trick up our sleeve…

Read on to find out how we untangled this ball of yarn + how to get a 10% discount on the Semilla Grosso range!


PROJECT

Swatching Grace by Denise Bayron using Semilla Grosso and Silky Kid

Loom & Spindle - Grace Swatch

AIM

Knit a swatch for the Grace pullover to explore:

  • If an appropriate gauge can be obtained using Semilla Grosso

  • The fabric’s hand-feel at the resulting gauge, and

  • The suitability of Semilla Grosso for a pullover intended for a ‘super bulky’ weight yarn

SKILLS

  • Casting on

  • Casting off

  • Knitting flat

  • Working a simple cable pattern

  • Translating pattern instructions into swatch parameters

TOOLS

  • 5mm (US 8) knitting needles (we used Chiaogoo Spin Bamboo Interchangables)

MATERIALS

1 x NATURAL WHITE (003)


DESIGN

The swatch was based on the Grace pullover by Denise Bayron, as published in Laine Magazine Issue 8.

The swatch itself was to be very simple, we wanted to test Semilla Grosso in the knitted fabric and also work-in a 1x1 rib and one cable repeat to see how the design details would translate. The resulting swatch was knit over 26 stitches incorporating these design elements.

Loom & Spindle - Grace pullover Swatch-3.jpg

DEVELOPMENT

The pre-swatch – Semilla Grosso

We tried a few different needle sizes on some pre-swatch swatches. 

Using the needle size recommended in the pattern, 9.0 mm (US 13), the resulting fabric was extremely loose and airy and was not going to be suitable for garment construction.

 Sizing down, the fabric was more cohesive but lacked structure.

We found a satisfactory fabric was obtained on 4mm (US 6) needles, with a resulting 5 stitches per inch. The fabric was smooth, felt durable and had spring. Unfortunately, at this finer gauge the pattern as written would become unworkable for our intended size.

Loom & Spindle - BC Garn - Semilla Grosso - White 01-2.jpg

The final Swatch - Semilla Grosso stranded with Silky Kid

Before giving up we tried one last swatch stranding Semilla Grosso with Silky Kid by Kremke Soul Wool. Our theory was, that by adding a strand of mohair we could knit at a looser gauge with the mohair halo filling in the ‘gaps’ to help maintain the structure of the fabric.

So finally, on 5mm (US 8) needles we discovered a soft silky fabric that had both stitch definition and structure, was surprisingly drapey and had a luxurious halo. And, the resulting gauge would allow us to work the pattern as written with only a few minor adjustments!

Loom & Spindle - Grace Pullover Swatch-1.jpg
Loom & Spindle - Grace Pullover Swatch-8.jpg
Loom & Spindle - Grace Pullover Swatch-7.jpg
Loom & Spindle - Grace Pullover Swatch-10.jpg

FINISHING

The swatch was soaked in a bath of cool water for around 5 minutes, the excess water pressed out using a towel. The swatch was then pinned out on a blocking mat, attention given to straightening the cable detail and aligning the stitches before being allowed to dry.

Final measurements:

  • 14 stitches over 10cm (4'')

  • 20 rows over 10cm (4'')

  • Overall dimensions, 15cm x 15cm (6'' x 6'')

INSIGHTS AND OPPORTUNITIES

GAUGE

With our pre-swatches telling us that Semilla Grosso and the Grace pullover might just not be compatible, we were really pleased to find a workable gauge when adding a strand of mohair.

Loom & Spindle - Grace Sweater Swatch-2.jpg

FABRIC

Semilla Grosso delivered smooth well-defined stitches, making the cable pattern pop. The mohair halo supported the looser gauge and provided structure and durability to the knitted fabric. These elements all came together to create a drapey fabric with a lustrous look and silky hand-feel.

Loom & Spindle - Grace Sweater Swatch-4.jpg

FINAL THOUGHTS

The super bulky weight yarn used in the pattern lends a certain look and feel to the original piece. Though we haven’t recreated this fabric, we think we’ve come up with something interesting that could be applied to this pattern with great results.

Ultimately, stranding Semilla Grosso with Silky Kid turned the Grace pullover into a viable project option for these yarns. We’ve done some preliminary calculations on working the pullover at this gauge and think we’ll get some exciting results. Stay tuned!

Loom & Spindle - Grace Sweater Swatch-6.jpg

THANK YOU FOR READING!

Would you like to save this swatch for later? 

Add this swatch to your Ravelry favourites HERE.


Keep on swatching…

You may also like…

Swatching with Cotton Fine: A knitted sample of Tegna by Caitlin Hunter
Loom & Spindle - Cotton Fine - Tegna Swatch-2.jpg
 

Swatching with Cotton Fine

A knitted sample of Tegna, by Caitlin Hunter

Here at Loom & Spindle, we’re proud omni-crafters! Passionately dabbling in all things fibre.

Today we’re taking a look at our first knitted swatch for Cotton Fine. Specifically, a sampler of Caitlin Hunter’s popular Tegna pattern.

We thought this light-weight summer style would be a good match for this sumptuous blend of Pima cotton and merino wool.

We knit the swatch to explore the interaction between gauge, knit fabric and fibre and assess the suitability of the yarn for a knitted project featuring lacework.

Below, we’ve included our notes on how we interpreted the pattern to become a swatch and our thoughts on the resulting fabric.

This ‘recipe’ is a great starting point if you want to have a go at swatching for your next knitting project.

P.S. At the end we’ve detailed the yardage required for all sizes should you wish to knit your own!

Loom & Spindle - Cotton Fine - Tegna Swatch-5.jpg

PROJECT

A knitted sample of Tegna by Caitlin Hunter, using Cotton Fine by Brown Sheep Co.

AIM

Knit a swatch in Cotton Fine to explore:

  • The fabric’s hand-feel at the resulting gauge

  • The suitability of Cotton Fine for lacework, and

  • Knitting garments in Cotton Fine

SKILLS

  • Casting on

  • Casting off

  • Knitting flat

  • Reading charts for lacework

  • Familiarity with decreasing, yarnovers, knitting through the back loop

  • Translating pattern instructions into swatch parameters

TOOLS

  • 3.25 mm (US 3) circular needles (we used Chiaogoo Spin Bamboo Interchangables)

  • Scissors

  • Tapestry needle

MATERIALS


PLANNING

We focused on setting parameters for the piece and interpreting the pattern to accommodate the swatch.

SIZE

  • Working with the patterns suggested gauge of 22 stitches over 10cm (4'') in stocking stitch and the stitch count for the lace repeat, we decided three lace repeats would provide a reasonable sample size and a visually balanced sample.

  • 60 stitches were required for the cast on.

SETUP

  • Cast on: Long-tail method

  • Cast off: A tapestry needle to thread the yarn tail through live stitches

LACEWORK

  • The pattern details the lace repeat both written (worked in the round) and as a chart.

  • We chose working with the chart as the visual aid was convenient when working the swatch flat.

  • We used stitch markers to define the beginning and end of each lace repeat.

NOTES

  • As 3.25mm was the needle size suggested in the pattern, we thought this would be a good starting point to explore gauge.

  • Our swatch will be knit flat as noted above. Please note the Tegna pattern, as written, is worked in the round.

METHOD

STEP 1

60 stitches were cast on using the long-tail method.

STEP 2

The lace repeat was worked flat until the end of the chart.

STEP 3

Approximately 10cm (4'') was knit in stocking stitch to complete the swatch.

STEP 4

The live stitches were secured by simply threading the yarn tail through the loops using a tapestry needle.

FINISHING

The swatch was soaked in a bath of cool water for around 5 minutes, the excess water pressed out using a towel. The swatch was then pinned out on a blocking matt, attention given to opening up the lacework and aligning the stitches that frame the lace detail.

GUAGE

The final measurements were:

  • 22 stitches over 10cm (4'')

  • 28 rows over 10cm (4'')

  • Overall dimensions, 20cm x 25cm (8'' x 10'')

INSIGHTS AND OPPORTUNITIES

THE GAUGE

Amazingly, we got gauge! When does that ever happen ;)

Though, it’s important to note that we worked the swatch flat. Working in the round could produce a slightly different row gauge.

Based on these results we’d go ahead and knit the garment on 3.25mm needles, monitoring row gauge and adjusting the body length in the stocking stitch section if necessary.

Loom & Spindle - Cotton Fine - Tegna Swatch-7.jpg

THE FABRIC

At this airy gauge, Cotton Fine has produced a soft drapey fabric with a smooth hand-feel.

The cotton/merino blend offers great stitch definition, the detail in the lace panel is clear and structural elements well defined.

The resulting texture is feminine and cool.

Loom & Spindle - Cotton Fine - Tegna Swatch-1.jpg

FINAL THOUGHTS

The lacework was intuitive and the pattern easy to follow. Using stitch markers definitely helped us track the lace repeats and catch those missed yarnovers!

Cotton Fine worked up nicely and we think it has great potential for light-weight knitted garments.

Tegna is an exciting introduction to both lacework and knitted garment construction and is highly recommended to anyone motivated to give it a try.


THANK YOU FOR READING!

Tegna by Caitlin Hunter can be found on RAVELRY.
Knitting in Cotton Fine? Here’s what you’ll need:

  • X-Small - 4 Skeins

  • Small - 4 Skeins

  • Medium - 5 Skeins

  • Large - 6 Skeins

  • X-Large - 6 Skeins

  • 2X-Large - 6 Skeins

  • 3X-Large - 7 Skeins


More on Cotton Fine…


You may also like…