HOW TO CONSTRUCT A WOVEN PIECE

In my up coming eBook I deconstruct the methods of frame-loom weaving and explore the foundation skills that make up a woven piece.

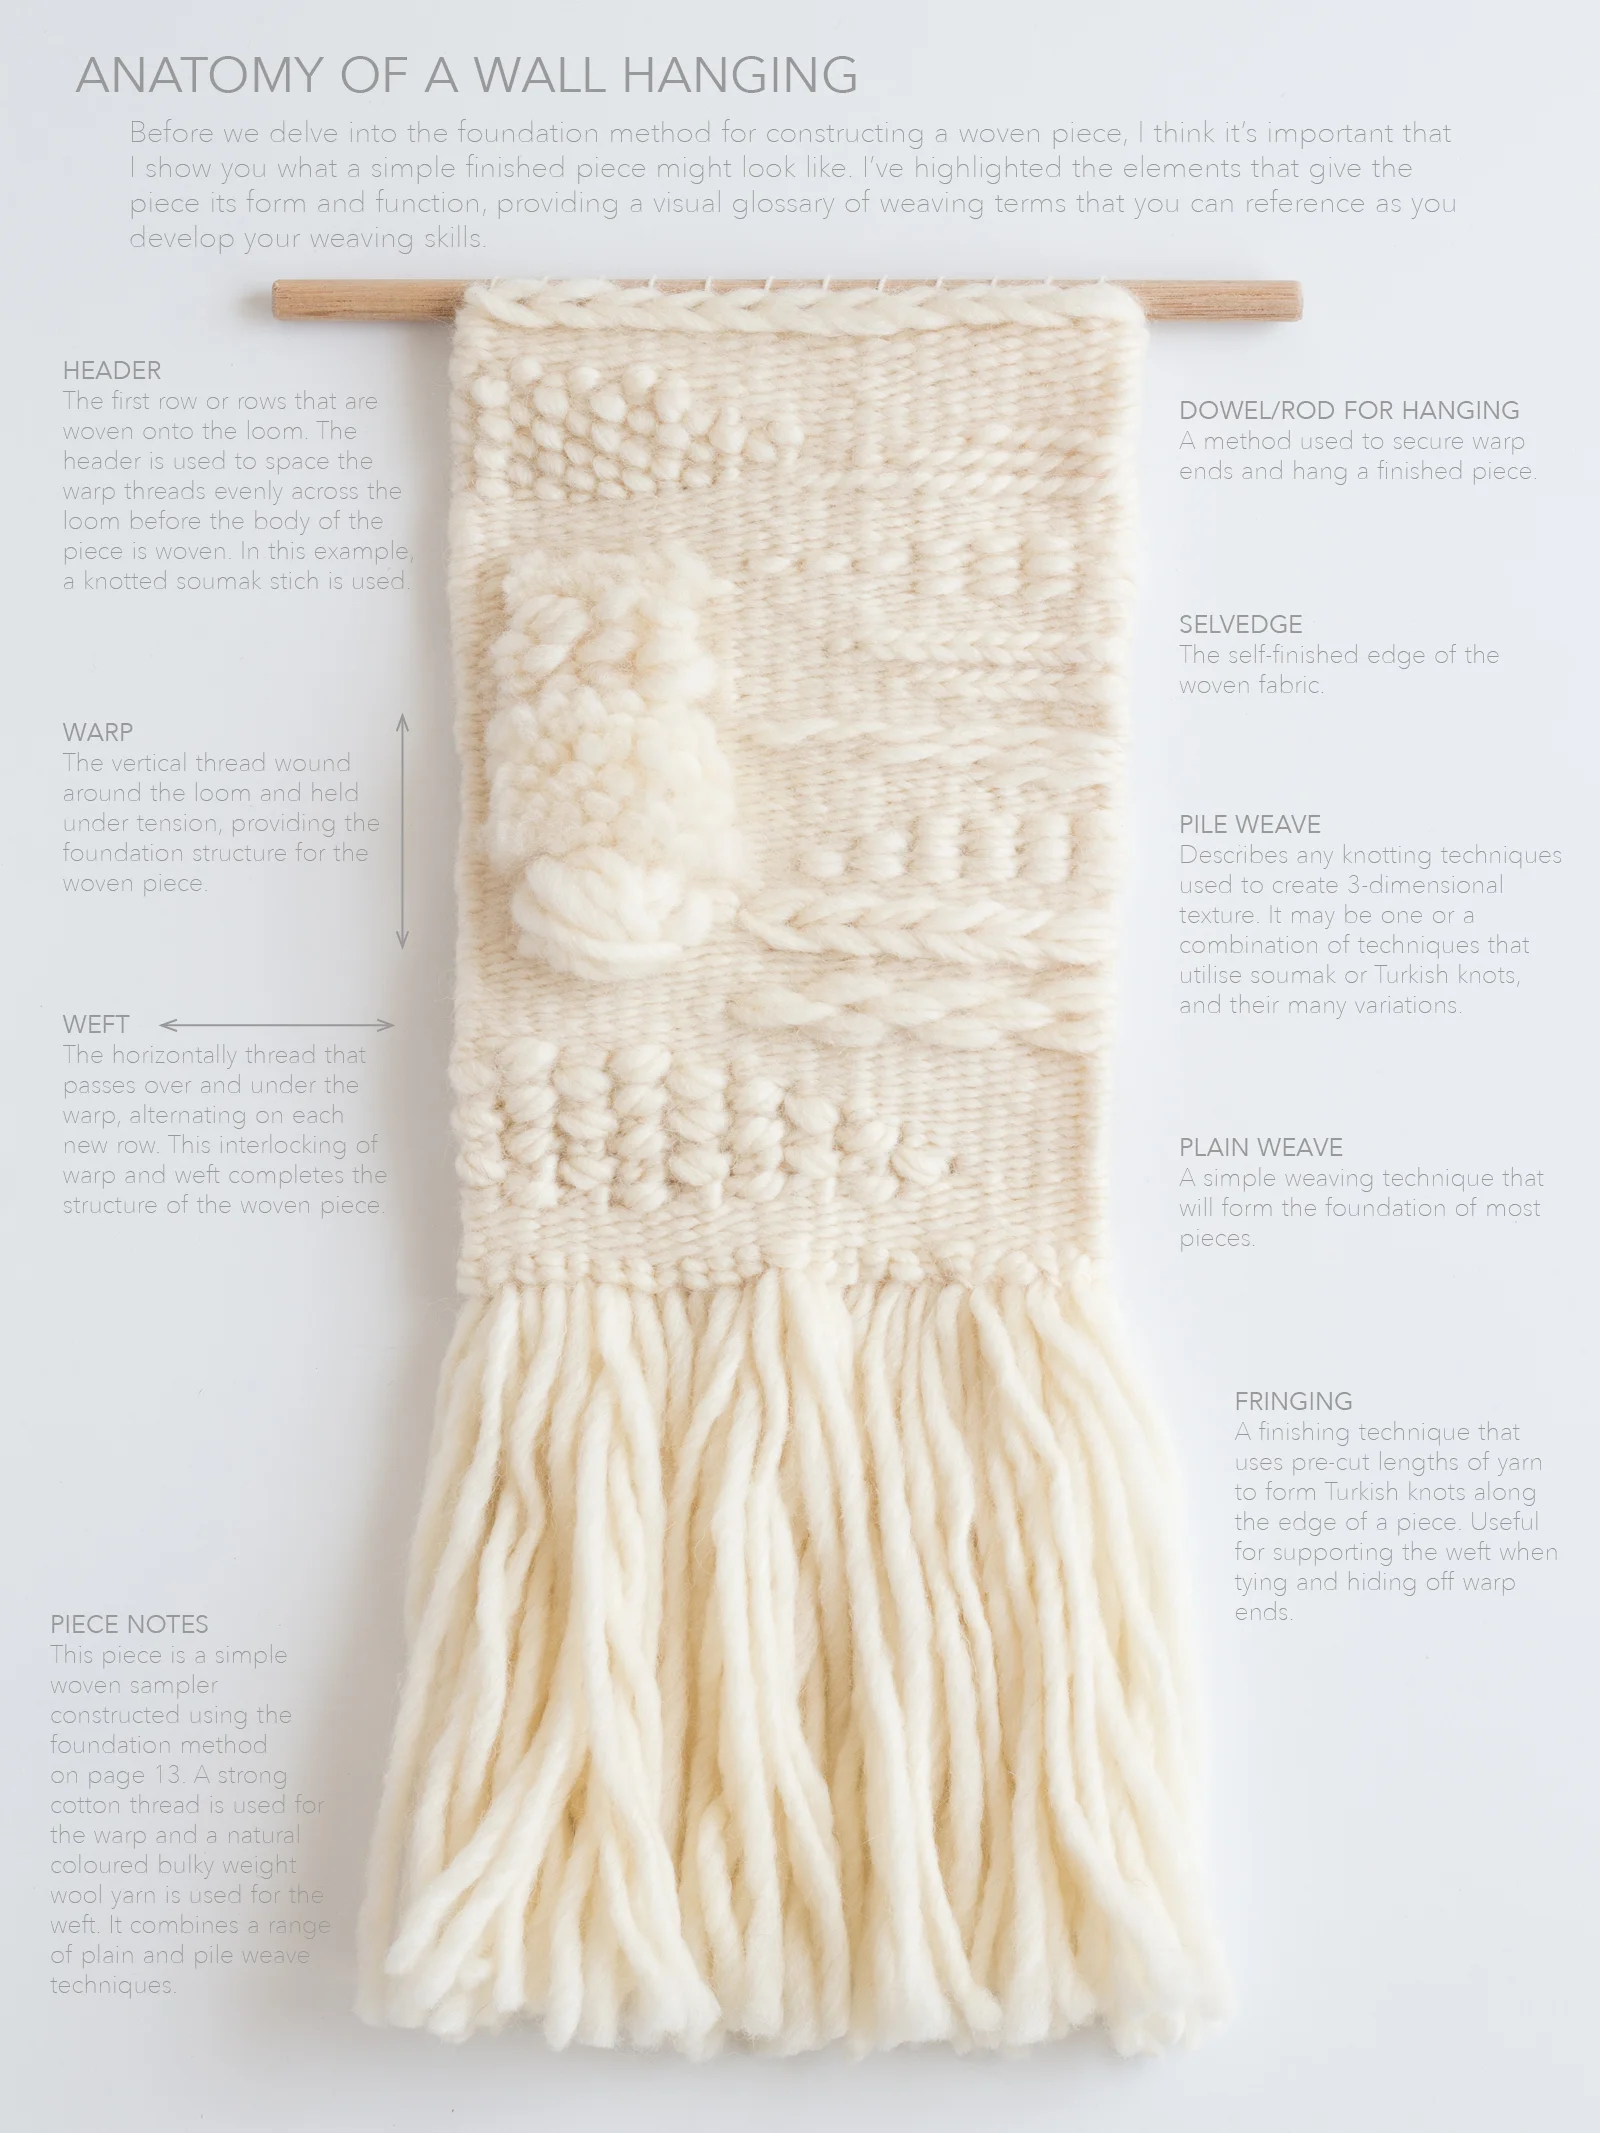
In my last post I shared an excerpt from the book showing the anatomy of a woven wall hanging.

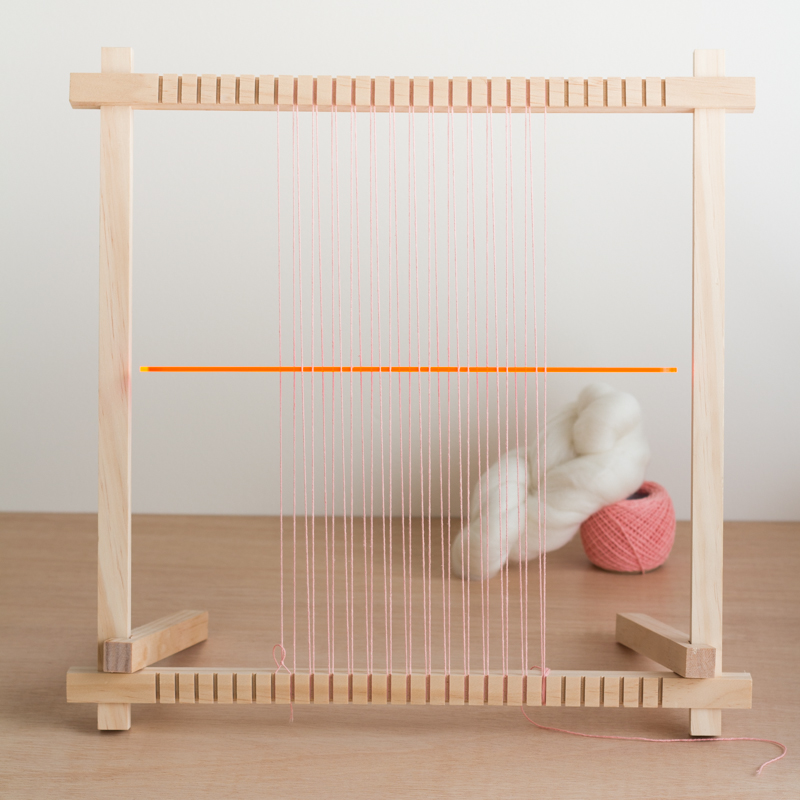
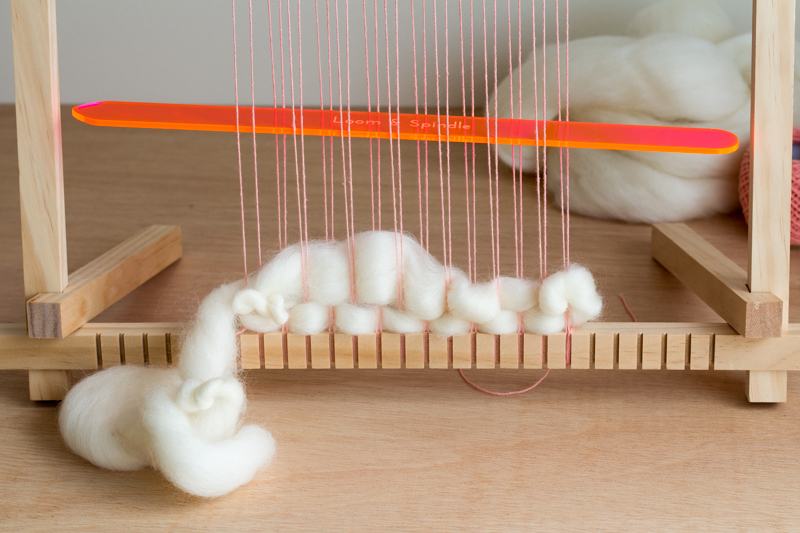
This week I break down the woven structure even further and present a straightforward recipe for constructing a simple woven piece.

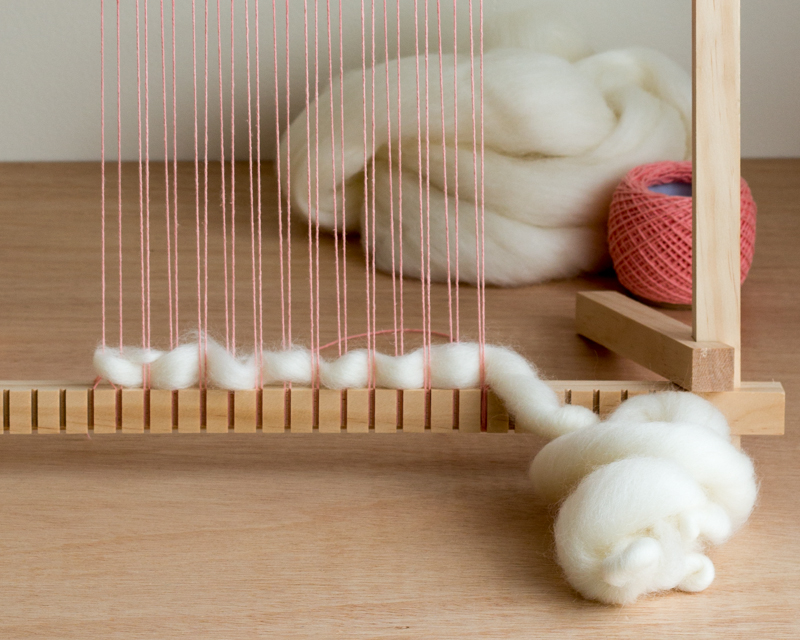
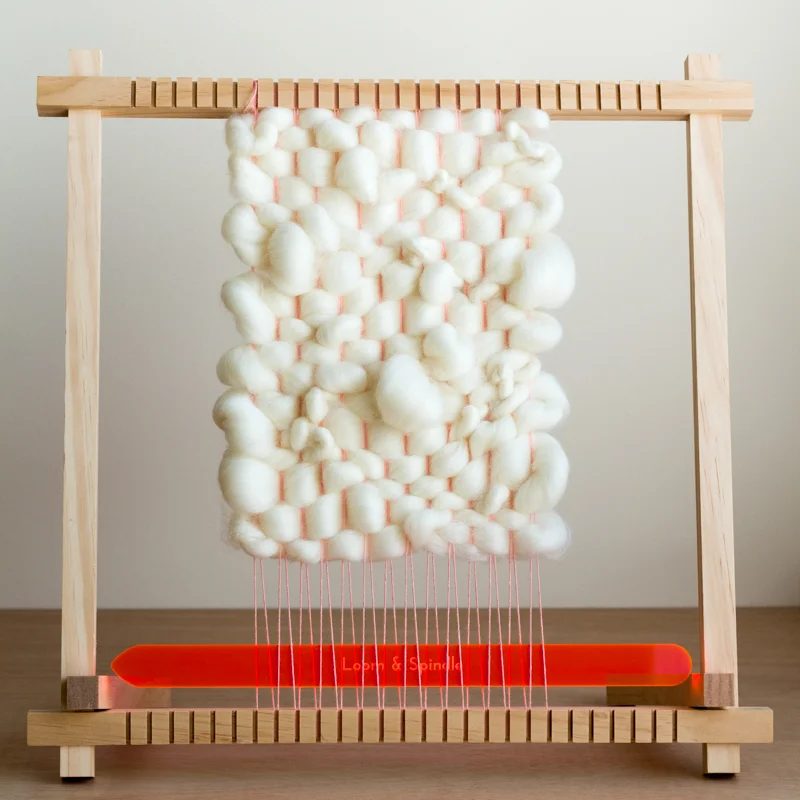
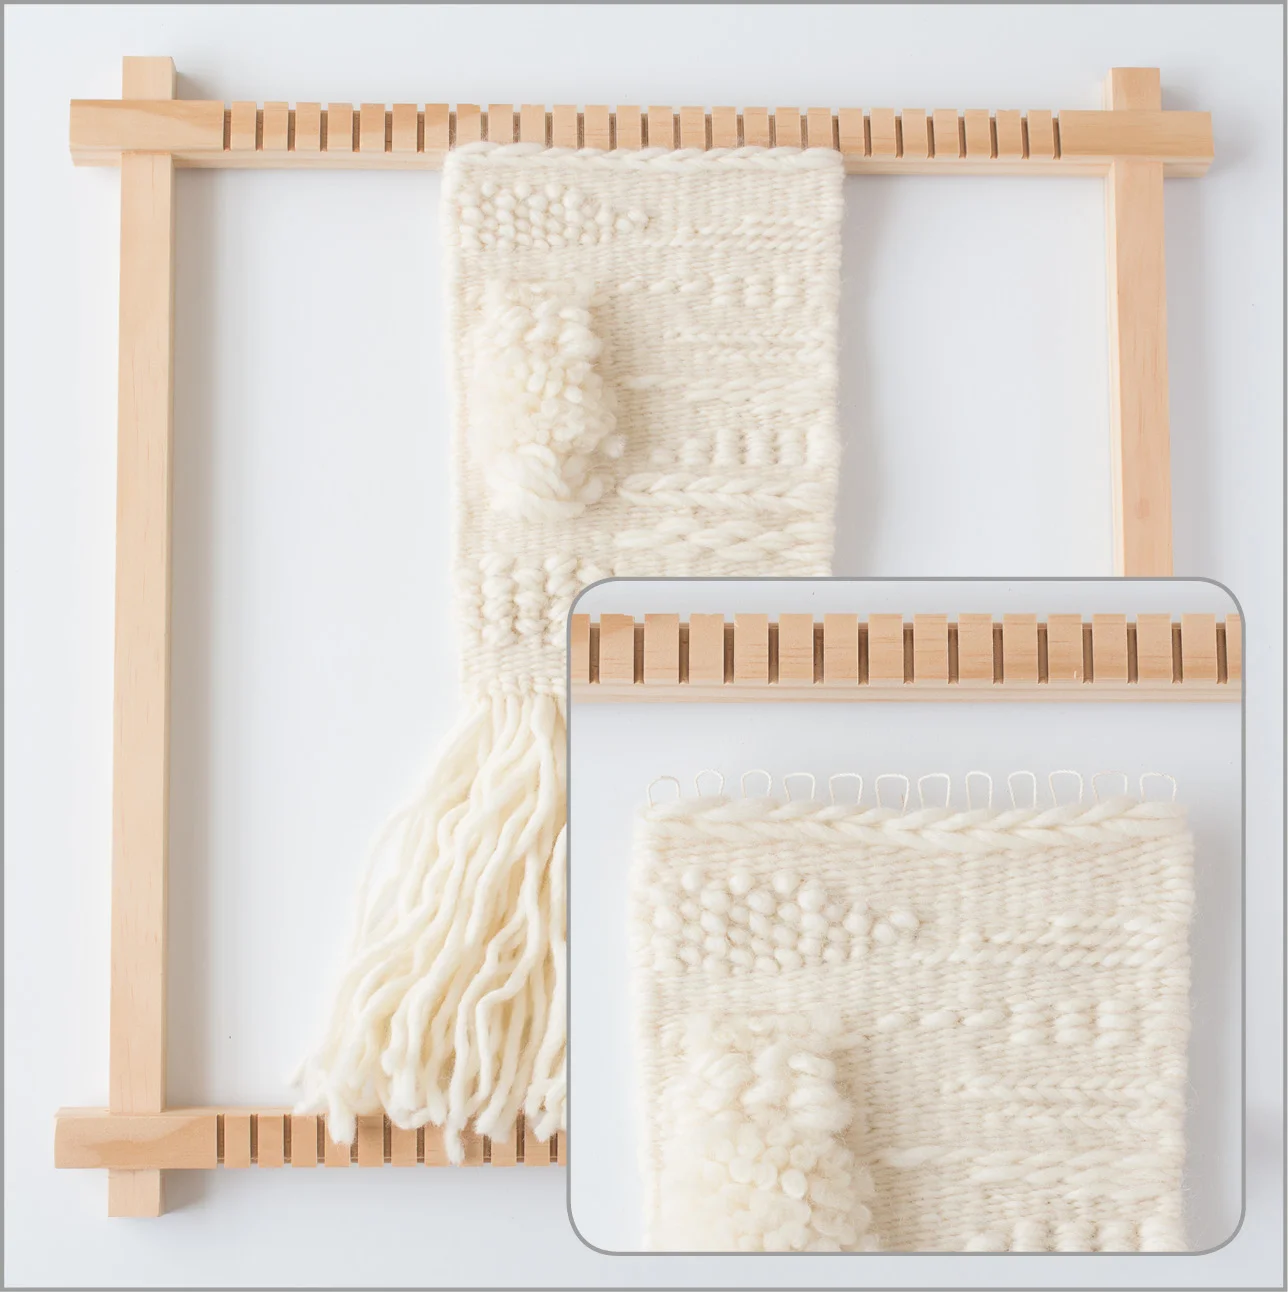
It is a unique method in that the design will be woven upside down and only turned the right way up at the end to add the finishing touches.

It is particularly suited to woven wall art as it results in evenly spaced loops at one end to hang the piece. Though, the method can easily be manipulated to accommodate other projects such as home furnishings or personal accessories.


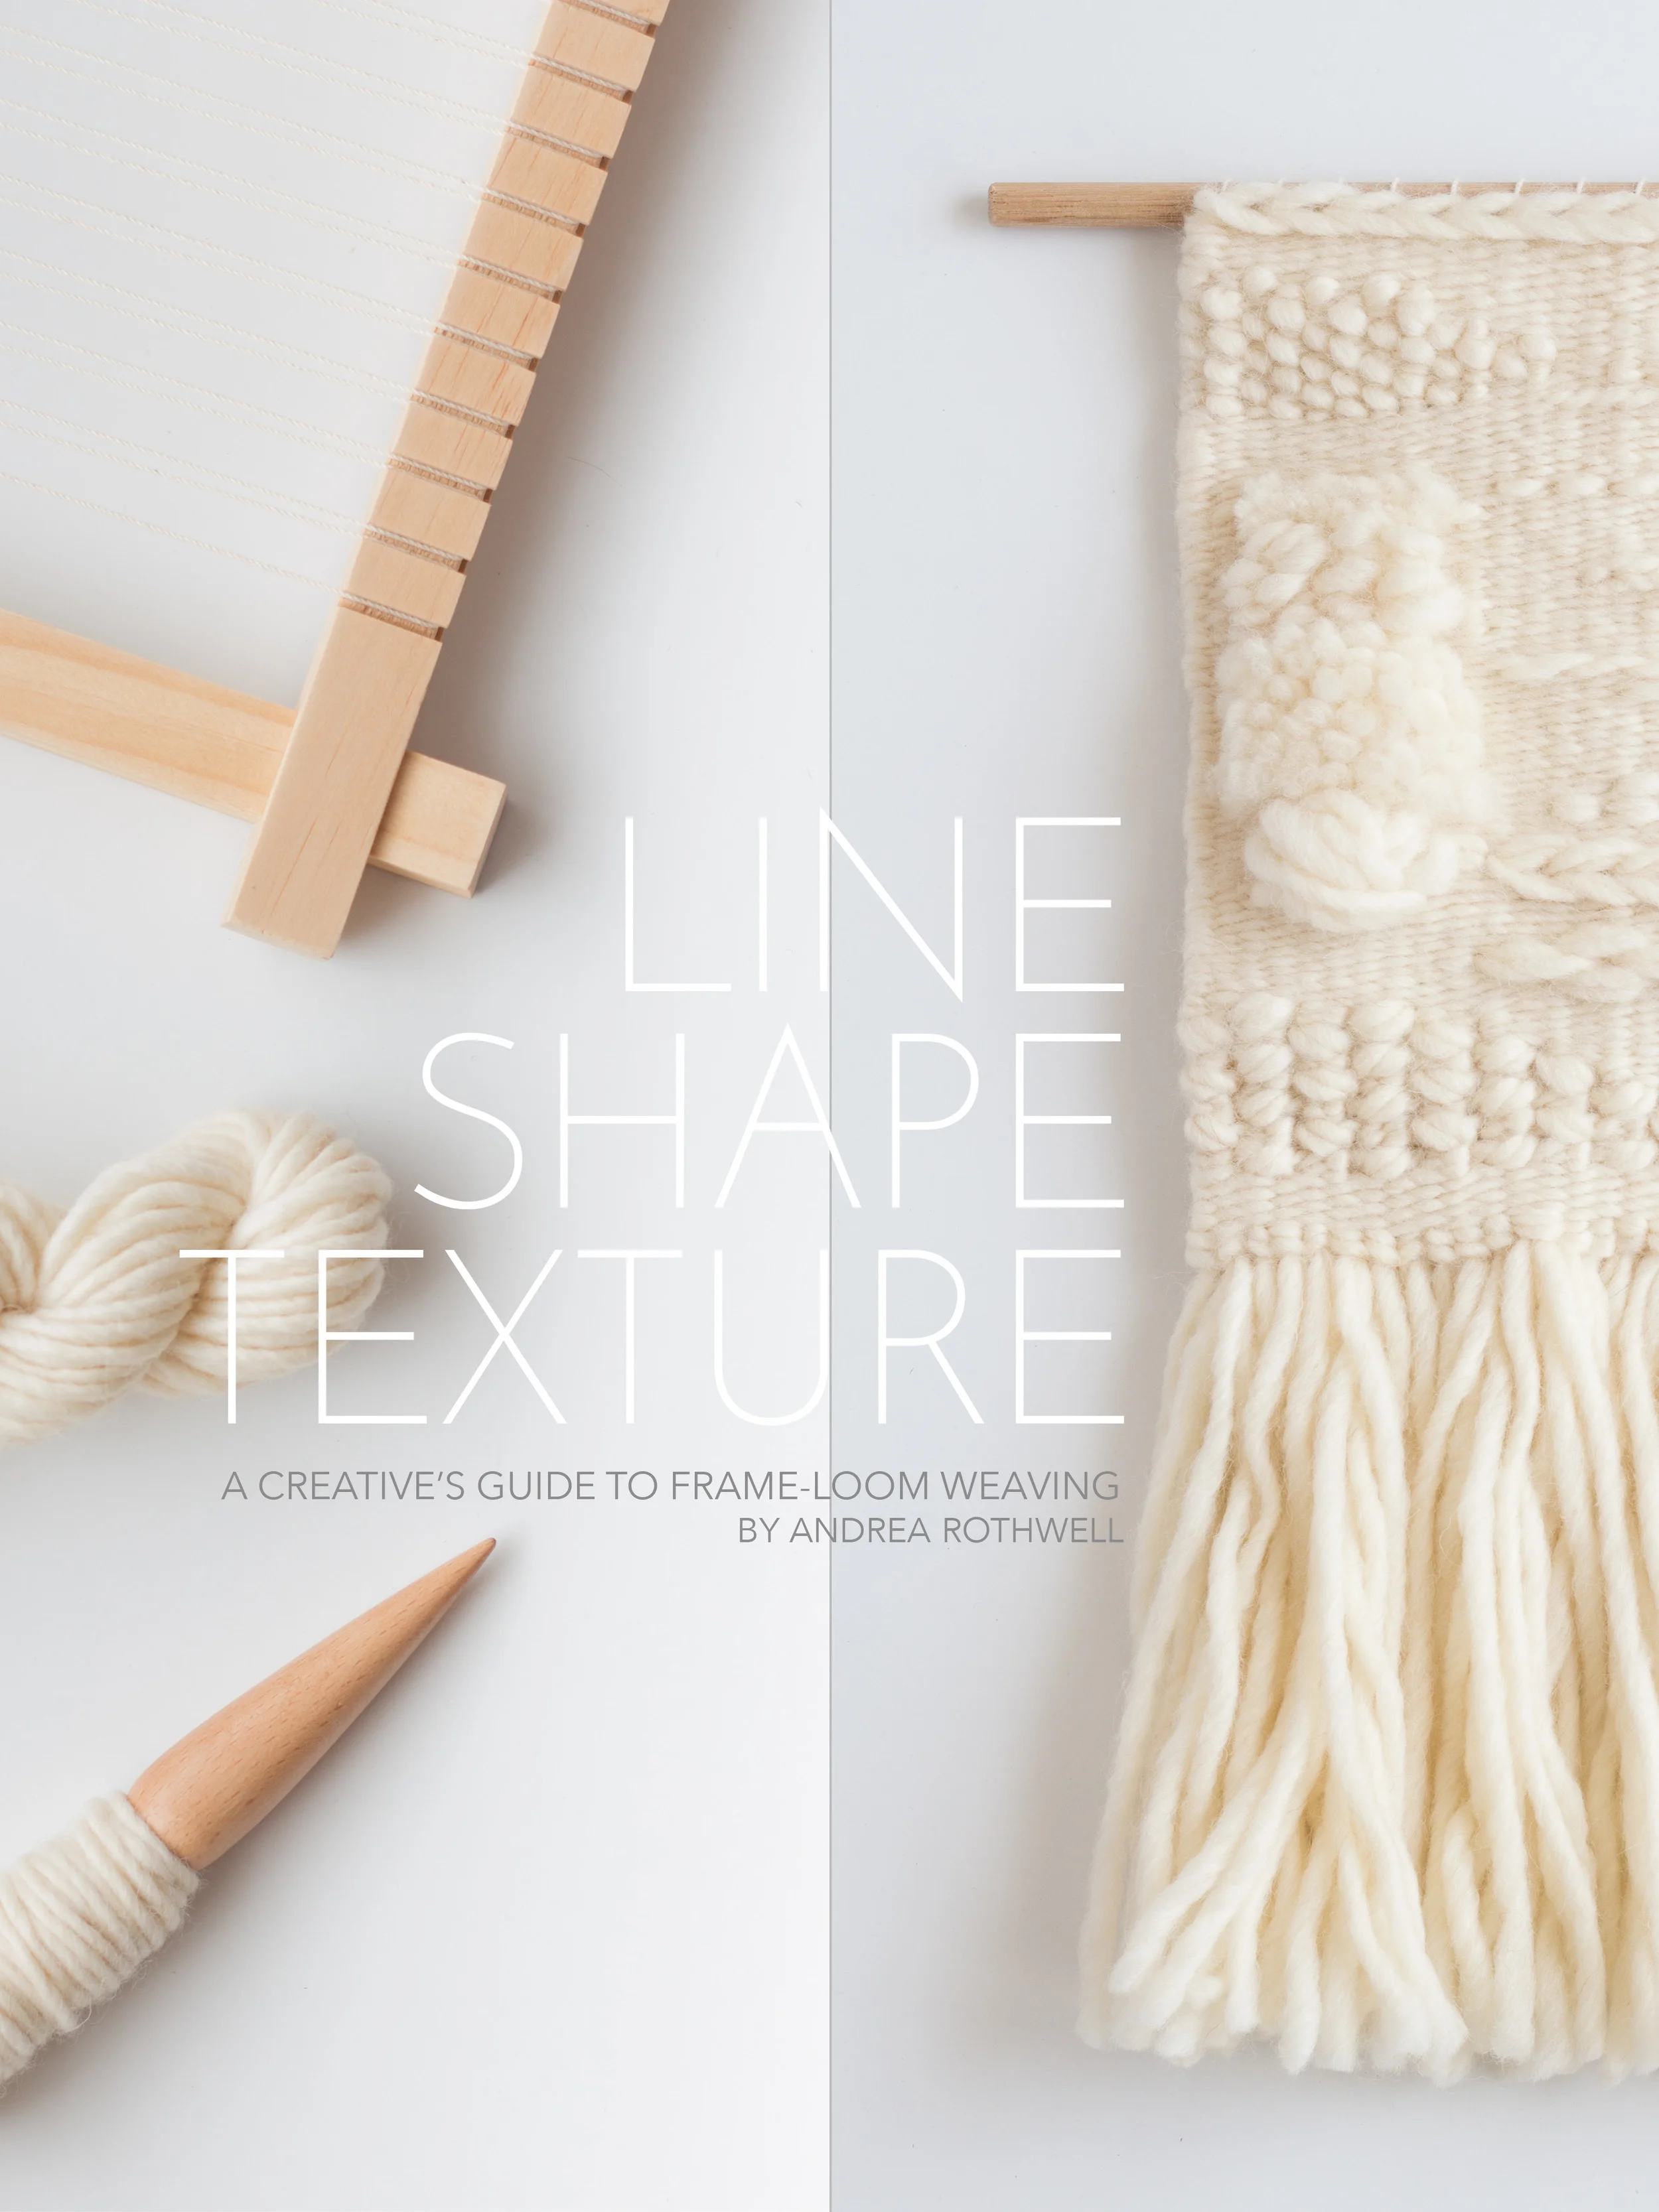
This tutorial is an excerpt from LINE SHAPE TEXTURE - A Creative's Guide to Frame-Loom Weaving. Download a free sample of our book to read the full excerpt!


Anatomy Of A Wall Hanging

Here's another little taster from our up coming eBook on frame-loom weaving!

3 Tips You’ll Need When Choosing A New Loom

What craft will you be occupying yourself with this holiday season?

If you’re thinking of giving frame-loom weaving a go or wanting to upgrade your current loom here are my three tips for choosing a new loom to get your holiday project wish list underway.

PS: I’ve also got a neat little table that you can reference when making your decision. You'll find it below!

Loom & Spindle Frame Looms

3 Tips for Choosing A New Loom

1. Decide what size pieces you want to make

  • You might be starting out and looking to experiment with various tools and techniques. A medium size loom for small to medium size pieces might work for you. You can practice your weaving skills with a small to moderate time investment for each piece.

  • If you’re taking the next step and looking to make larger pieces for wall décor or home furnishing projects it might be time to invest in that large loom you’ve had your eye on. A large loom will of course accommodate larger projects but it may also require a greater investment of your time to complete each piece.

  • In my last post I spoke about planning and sampling for success with your pieces. This is where a small loom comes in handy as it makes quick work of sampling for larger projects.

2. Consider where and how you will be using your loom

  • Where will you do most of your weaving? Are you at home, on the couch, at the kitchen table? Or, maybe you want the freedom to take your loom out on the open road?

  • You’ll need a loom that is comfortable to use in your preferred working environment. A small to medium size loom is great for around the house and is comfortable in most situations. A larger loom will be a bit more cumbersome and limit the positions in which you can work comfortably.

  • Travelling with your loom and weaving what you see outdoors can be a great experience. A smaller portable, travel size loom might be ideal for these occasions.

3. Give thought to how pre-defined warp spacing will influence the look and feel of your pieces

  • For a beginner, I always recommend a sett (warp spacing) of 4 warp ends for every 2.5cm (4 ends per inch). This wide sett tends to cover quickly and will accommodate a range of yarns and fibres.

  • A loom with this spacing will also allow for a finer sett of 8 ends per 2.5cm (8 ends per inch). A finer sett will allow you to weave finer detail however it may be more labour intensive. To achieve this finer sett, warp with two threads and use a few rows of plain weave to even out the spacing before you begin your design.

Other things to look for

Frame looms come in all shapes and sizes and are generally characterised by having a timber frame with a series of nails, pegs or teeth along two opposite ends on which the warp can be wound and held firm. The construction should be simple and robust. Its purpose is to hold the warp threads under tension and evenly spaced while weaving. The need for a complex heddle system is generally unnecessary, as you will be manipulating both the warp and weft by hand.

A Frame-Loom Buyers Guide

The table below categorizes the common loom sizes and provides some insight into how and when you might use them. I’ve also included some potential limitations to help inform your decision when choosing a new loom.

Frame-Loom Buyers Guide
A WEAVERS METHODOLOGY: Tips for becoming a more thoughtful and intuitive weaver

This methodology is an excerpt from my eBook, LINE SHAPE TEXTURE: A Creative's Guide o Frame-Loom Weaving.

 It is a framework I developed over the last few years whilst learning to weave.

My journey involved immersing myself in all things woven – I attended courses, read books and began sampling. My aim was to develop my skills as a frame-loom weaver and improve the overall quality of my work.

What I gained from this self-study was an understanding of how woven elements can be applied and adapted, and crucially a good appreciation for why planning my pieces was so important.

This methodology helped me become a more thoughtful and intuitive weaver. I hope by sharing this framework I can help you develop your weaving and improve the overall success of your pieces.

It's also available as a handy infographic! You'll find it below, please feel free to share, pin or blog it.


A WEAVERS METHODOLOGY

Tips for becoming a more thoughtful and intuitive weaver

  1. Get to know the foundation skills and language of weaving

    - Become familiar with different weaving styles
    - Get to know various construction methods
    - Seek out as many resources as you can

    Knowledge is power!

  2. Consider how the foundation skills can be applied to give rise to your own creative ideas

    Reflect on the various ways these elements can be further adapted through your choice of colour, materials, textures and loom.

  3. Experiment and weave samples

    This really is the only way to learn how warp spacing, yarn weight and fibre interact and influence the look and feel of your woven piece.

  4. Plan your piece

    Sketch your design and give thought to how your piece will be constructed
    Lay out your materials and assess colour and texture.

  5. Did I mention plan your piece!

    Before you start, find a solution to these design constraints:

    - The size or your loom and weaving area
    - Your warp spacing and yarn weight
    - Securing warp ends
    - Removing the piece from the loom
    - Hanging or displaying your piece

     Can your desired effect be achieved?

  6. Add quality and longevity to your work by using appropriate techniques and materials

    - Start with a solid framework
    - Secure both warp and weft appropriately
    - Consider any need for colourfastness, sun protection or pest resistance.

  7. Record your insights

    Decide what you liked, what worked and why it worked

    If some elements didn’t work as you’d hoped, consider why and ask yourself what could be modified to improve that element next time.

  8. Appreciate and enjoy the experience of creating a woven piece by hand!

    In all of its various forms, hand weaving should be a gentle and organic approach to cloth making.


A WEAVERS METHODOLOGY INFOGRAPHIC
LINE SHAPE TEXTURE
$11.99
Add To Cart
Just Add Twist - Weaving with Hand Spun Roving
Weaving with hand spun roving

I never thought I'd become a hand spinner, it just didn't appeal to me much. I guess I thought you needed expensive equipment, access to fleece and it always seemed, well, just a little bit daggy. It all changed for me though during those long hours spent nursing my baby and armed with my iPad. My imagination was ignited by all the possibilities that spinning your own yarn provided.  Determined to learn more, I spent my time absorbing as much as I could about fibre, how it's processed, how it's prepared, and ultimately what makes yarn, yarn.  And do you know what I discovered? It's all about twist.

Twist is the glue that holds fibre together. It gives yarn its strength and it enables you to create one continuous strand of yarn from a single mass of fibre. Twist is really fun to experiment with and you don't need any special tools or equipment. Without giving you a full science lesson on the physics of twist I'll share one of my techniques which will help you explore twist in your own projects.

For this technique I've used wool roving which is a ready-to-spin wool fibre. The wool fibre has been combed so all the individual fibres sit parallel to each other. This preparation allows for easy drafting, the process of pulling fibres past each other before adding twist to hold them all in place.

To get started I pre-drafted my roving.

Drafting the roving doesn't have to be uniform. I left some areas thick and made some areas thin as it will create a more bubbly woolly texture in the final piece. 

I then added twist to the pre-drafted roving.

When you take the roving off your hand it begins to look a bit more like yarn. You'll notice the energy created by twisting has been released through the yarn. The result is a light and airy woolly yarn that's really fun to weave with.

Hand spun roving

When it comes to weaving with hand spun roving it can be handy to have a shed stick or weaving sword on hand. The shed is the opening between warp threads through which the weft is passed. A shed stick can be any flat, smooth stick that's used to create an opening between warp threads. Loom & Spindle have designed a range of shed sticks which can be found here in our shop. If you don't have access to a shed stick try using an old ruler or thick piece of card board cut to size.

To begin weaving I warped my frame loom with a pink 4 ply crochet cotton and used the Loom & Spindle shed stick to open the first shed.

To finish, keep building up the fabric row by row as I've shown you above. You''ll soon develop a feel for the roving and how twist interacts with the fibre. You can pull out the thicker bits to make big puffy fibre clouds or let the thinner areas twist back on themselves to make little spirals. Play around with it and have fun.

Building up the fabric row by row.

If your looking for roving or other fibre to experiment with I've found that Etsy is a great resource. There are some really interesting shops speciallising in hand dyed and hand prepared fibres. My favourites right now are Hey Lady Hey, One Handmade Life and Just a Day Dream. I've also added the roving I've used in this tutorial to the Loom & Spindle shop to help get you started.

Weaving with hand spun roving

You'll find that weaving with hand spun roving is a lot of fun. It covers really quickly and creates very textural weave. I hope you've enjoyed this little introduction to spinning and will perhaps try it yourself.